Starting Solids: The 3 Essential Rules for Baby's First Foods

There are so many ways to introduce and give the first foods to your child. Proper nutrition is critical, and as gastro-hepatology consultant pediatrician Dr. Frieda Handayani says, any method applied must prioritize nutritional needs to support each stage of growth. Errors in feeding can have serious consequences, leading to eating difficulties and even malnutrition.

"The first time feeding a child, there will be many challenges, so we must be patient. But it is a child's learning process that must be passed," Dr. Frieda advises.

To navigate this new chapter successfully, here are the three essential rules you must follow when giving your child their first foods.

Rule 1: Follow Your Baby's Cues, Not Just the Calendar

While the general recommendation is to start solids around 6 months, the most important factor is your baby's individual developmental readiness. Forcing food before they are ready can lead to frustration and feeding aversions.

Look for these key signs of readiness:

  • They have solid head and neck control and can sit up well with minimal support.

  • They show significant interest in food by watching you eat, leaning forward, and trying to grab what's on your plate.

  • They have lost the "tongue-thrust reflex" that automatically pushes food out of their mouth.

  • They open their mouth when food comes their way.

Only when your baby is showing these signs are they truly ready to begin their solid food adventure.

Rule 2: Introduce New Foods One at a Time (The 3-Day Rule)

This is the most critical rule for identifying potential food allergies or sensitivities. When you introduce a new food, offer it exclusively for 3 to 4 days before introducing another new food.

How it works:

  1. Start with a single-ingredient purée (like mashed avocado, sweet potato, or iron-fortified baby cereal).

  2. Offer this same food once a day for 3-4 days.

  3. During this time, watch for any signs of a reaction, such as a new rash, hives, vomiting, diarrhea, or other signs of discomfort.

  4. If there is no reaction, you can safely add that food to the "accepted" list and move on to introduce another new food, following the same 3-day process.

This simple rule removes the guesswork. If a reaction does occur, you will know exactly which food caused it.

Grabease113.jpg

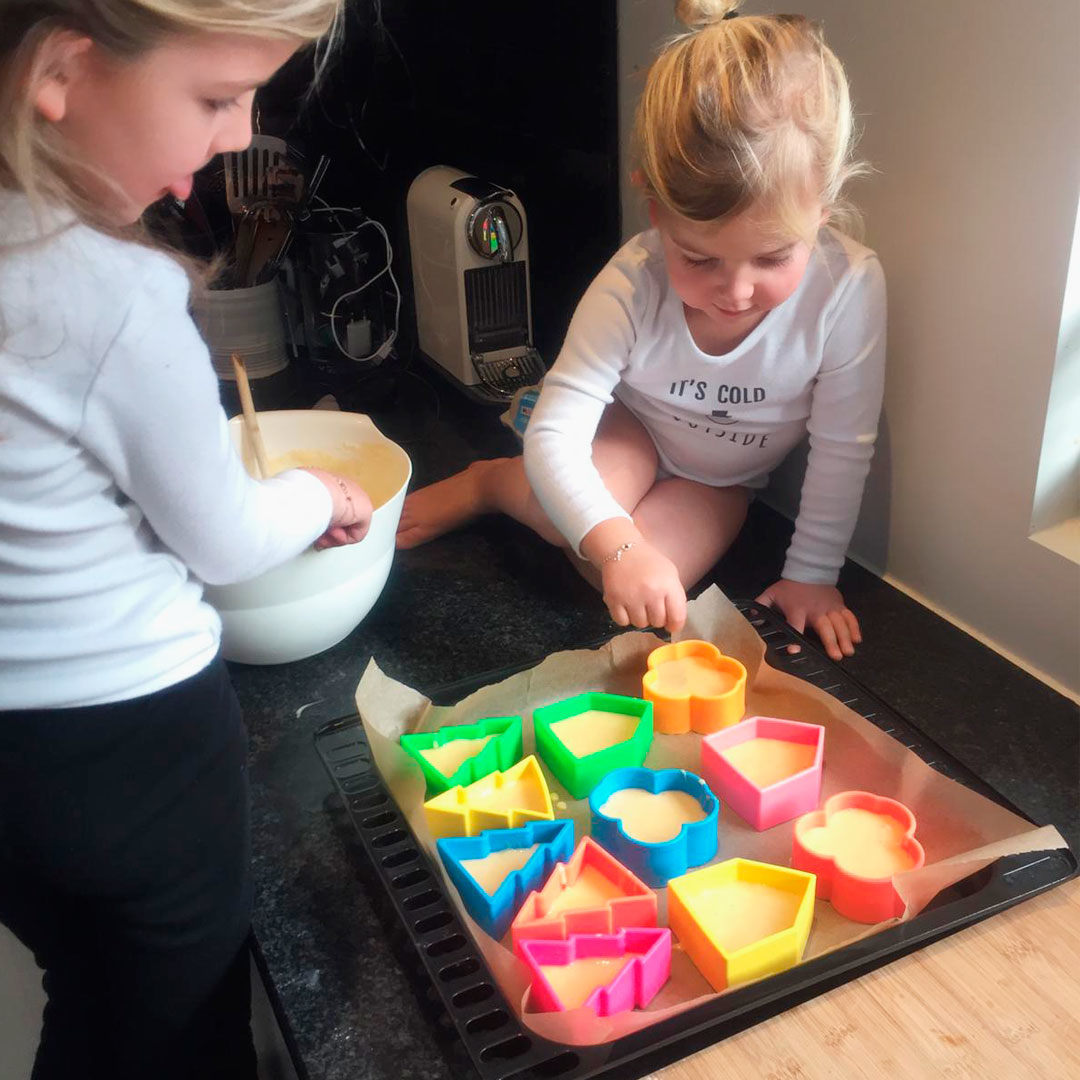
Rule 3: Prioritize Safe Textures and Progression

A baby's ability to chew and swallow develops over time. It's crucial to offer textures that match their current ability to prevent choking.

Follow this general progression:

  • Stage 1 (First Foods): Start with very smooth, thin purées. The texture should be like a soupy paste that is easy to swallow.

  • Stage 2 (6-8 Months): As they get more comfortable, you can thicken the texture to be more like a traditional mash with soft lumps. This encourages them to start using their tongue and jaw to move food around.

  • Stage 3 (8-12 Months): Introduce soft, mashable finger foods. The food should be soft enough that you can easily squish it between your thumb and forefinger. Think small pieces of banana, avocado, steamed carrots, or puffs that dissolve easily.

Safety is non-negotiable. Always supervise your baby during mealtimes. Avoid hard, round foods like whole grapes, nuts, and hard candies, as these are serious choking hazards.

By following these three simple but essential rules, you can create a safe, positive, and healthy foundation for your child's lifelong relationship with food.

Maya Product Photo Shoot-217.jpg

A Parent's Guide to Choosing the Best Straw Cup for Your Baby

Editor's Note:

This article was originally a "best of" list from 2021. To provide more timeless and useful advice, it has been updated to be a comprehensive guide on the features to look for when choosing the perfect straw cup for your baby's developmental needs.


Choosing the right cup for your baby can feel overwhelming when you’re standing in front of a wall of 30+ options. But whether you like it or not, it's a must-do job. Pediatricians recommend weaning your baby from the bottle and switching to a cup around 12 months old. This is crucial for supporting appropriate oral motor skill development, as it helps them exercise their facial muscles, tongue, and soft palate—all of which are connected to speech and feeding.

The Big Debate: Sippy Cup vs. Straw Cup

Before you choose a cup, it's important to understand why experts have a clear preference.

Just like with a bottle, a baby places their tongue at the front of their mouth to suckle from a traditional hard-spout sippy cup. For this reason, many pediatricians and speech and language pathologists now recommend straw cups over sippy cups. With a straw, your baby learns the more mature skill of pulling their tongue to the back of their mouth when they drink. This helps them develop a proper swallowing pattern that they will use for the rest of their lives.

How to Choose the Best Straw Cup: A Checklist

Instead of focusing on brands, focus on these key features that make a straw cup effective, safe, and easy to use.

1. A Weighted Straw

This is the most important feature for beginners. A flexible straw with a weighted end will anchor itself in the liquid, allowing your child to get a sip from any angle, even when the cup is tilted. This dramatically reduces frustration.

2. Spill-Proof vs. Easy-to-Sip (Valve vs. No Valve)

  • Spill-Proof (Valve): Many cups have a valve in the straw to prevent leaks. This is great for travel but can be difficult for a new learner to suck from.

  • Easy-to-Sip (No Valve): A valve-free straw is not spill-proof, but it's much easier for a baby to learn with. It's also the best choice for thicker drinks like smoothies.

3. Safe, High-Quality Materials

Always ensure the cup is made from safe materials. Look for labels that explicitly state the product is free of BPA, BPS, phthalates, and other harmful chemicals. The cup itself might be durable polypropylene plastic or even stainless steel. The straw should be made from soft, medical-grade silicone that is gentle on your baby's gums.

4. Easy-to-Hold Handles

Look for cups with handles that are ergonomically designed for little hands. This promotes independence and helps your child master the coordination required to hold, lift, and drink all by themselves. Bonus points if the handles are detachable for easy packing in a diaper bag.

5. Hygiene and Ease of Cleaning

A cup is only as good as how easy it is to clean. Look for cups with minimal parts that are dishwasher safe. An attached or swivel-top lid is a great feature for keeping the straw clean when you're on the go. A straw-cleaning brush is an essential accessory, so it's a huge plus if one is included.

6. Insulation (A Nice Bonus)

For long days out or for parents in warmer climates, consider a cup with vacuum insulation. A durable stainless steel, insulated cup can keep beverages cold and fresh for hours, which can be a lifesaver on a hot day.

9 Baby Hacks and Must-Haves to Make a New Mom's Life Easier

Being a mother in this modern era is not easy. The challenges are complex, and you're expected to be a master of time management and financial planning. You’ve probably heard people telling you that you need a stroller, a teether, a sterilizer—but with so many options out there, how do you know what kind to get?

Here, we give you the inside scoop on the real must-have items and the hacks that make all the difference.

9 Baby Hacks to Make Mom’s Life Easier

1. Stroller and Car Seat

  • What they don’t tell you: You need a travel system AND a lightweight stroller.
    Yes, this is the top of the list because you can't leave the hospital without a car seat. A travel system is a lifesaver, allowing you to click the car seat out of its base and onto your stroller without waking the baby. But you won't always want to push that heavy system around. Having a second lightweight, easily collapsible umbrella stroller on hand for quick trips will save you tons of time and effort.

2. Baby Blankets

  • What they don’t tell you: Get swaddle blankets made from a large, stretchy material.
    Swaddling comforts babies by reminding them of their snug days in the womb, helping them self-soothe and sleep better. But a difficult-to-use blanket is useless. Look for large swaddles (around 47x47 inches) made from a soft, breathable, and stretchy fabric like bamboo rayon or organic cotton. This gives you plenty of room to get a secure wrap that your little escape artist can't kick off in seconds.

3. Baby Carrier

  • What they don’t tell you: Try it on before you buy it.
    A baby carrier that’s actually comfortable will be your best friend. Don't just buy one online without testing it. You need to look for one with easily adjustable straps for your shoulders and hips. This allows you to evenly distribute the baby's weight and save yourself from serious back pain.

4. Breast Pump

  • What they don’t tell you: Portability and a "closed system" are key.
    If you plan on nursing and pumping, you need a reliable pump. If you’re heading back to work or are always on the go, invest in a sturdy, daily-use pump. Look for a portable "closed system" pump. This hygienic design has a barrier to prevent milk from getting into the tubing, making it safer and easier to clean.

5. Feeding Essentials

  • What they don’t tell you: An anti-colic venting system is a non-negotiable feature.
    When choosing bottles, the most important feature is one that helps reduce gas and discomfort. Look for bottles with a built-in anti-colic venting system. These are designed to let air in while preventing your baby from swallowing it, which can make a huge difference for a gassy baby. A wide-neck design made from soft silicone also makes cleaning much easier.

6. Diaper Bag

  • What they don’t tell you: Get one you don’t mind calling your purse.
    You'll be carrying this bag everywhere. As long as it has tons of pocket space, a washable matte finish, and straps that easily attach to your stroller, you’ll be good to go. Choose a style you genuinely love!

7. Teething Toy

  • What they don’t tell you: Look for one that's ergonomic and can apply teething gel.
    There will come a time when you’ll do anything to make teething pain go away. The most effective teethers are more than just cute. Look for one made from FDA-approved food-grade silicone with an ergonomic design that's perfect for small hands to hold. The best ones have textured bumps on the head that not only feel good on sore gums but are also perfect for applying teething gel right to the source of the pain.

8. Breastfeeding Pillow

  • What they don’t tell you: You need a compact one for travel.
    You will come to rely on this pillow to save your back during countless feeding sessions. In addition to your main one at home, get a second nursing pillow that’s compact and easy to carry around. This makes feeding on the go, at a friend's house, or while traveling infinitely more comfortable.

9. Baby Toys

  • What they don’t tell you: Buy toys that serve more than one purpose.
    Raising a baby is expensive, so choose your toys wisely. The best toys are open-ended and multi-functional. Look for items made from durable materials like food-grade silicone or wood that can be a teether, a stacking toy, a bath toy, and even a baking mold all in one. The more ways a child can play with it, the more value it provides over time.

Always remember—everyone’s experience is different. So, don’t feel compelled to adopt our exact recommendations. This is what has worked well for us. But if you consider the essential categories and features we mentioned, you’ll be more than prepared for your baby

Take a deep breath. It’s all going to be great!

6 Fun and Easy STEAM Activities to Do With Your Child

Editor's Note:

This article has been updated to provide general, evergreen ideas for STEAM activities. The original brand recommendations have been removed to focus on the types of toys and materials you can use, many of which you may already have at home.

To explore our curated collection of high-quality, educational toys that support STEAM learning, please click here to visit our toys category page.


Why Are STEAM Activities So Important?

You've probably seen "STEM" or "STEAM" toys on store shelves, promising to encourage your child's skills in Science, Technology, Engineering, Arts, and Mathematics. But do they really deliver?

The real magic of the STEAM method is that it frees each child to explore their own unique mindset and creativity. It gives them the tools to discover new ways of problem-solving, innovating, and seeing the connections between different fields. The goal of STEAM is to spark a lifelong love of learning and discovery from an early age.

Best of all, these activities are perfect for parent-child bonding time.

600x-7.jpg

6 Easy STEAM Activities to Try at Home

1. Sand or Dough Prints

This classic activity trains a child's sensory and motor nerves all at once. You just need clean sand, play dough, or even kinetic sand and various molds.

Look for versatile silicone molds. Their soft, flexible nature makes them perfect for little hands to press into sand or dough. The best part? These same molds are often oven-safe, so you can use them in the kitchen to make fun-shaped cakes or crayons later! This activity helps children recognize shapes and develop creativity.

2. Make Your Own Sculptures

Toys that can be formed and reformed freely are perfect for sharpening a child's fine motor skills and three-dimensional thinking.

While homemade play dough is great, you can also look for high-quality, plant-based modeling dough. These are often made from things like potato starch, making them 100% biodegradable and completely safe for even the youngest artists who might put things in their mouths.

3. Color Stamping

Playing with color stamps is a cheap and easy way to stimulate creativity. All you need is some paper or cardboard and a safe, non-toxic paint or food coloring.

Show your child how to dip their hand into the color and make a handprint on the paper. But don't stop there! Try using other parts of the body, like feet and fingers, or get creative with household objects. The end of a celery stalk or a cut banana stem can produce beautiful, unique shapes.

4. Single-Shape Puzzles

Puzzles are a fantastic way to practice creative thinking while sharpening logic. But instead of a traditional jigsaw, try a single-shape construction set.

These deceptively simple toys consist of multiples of just one shape (like two plus-signs connected). This is the ultimate in open-ended play, as a child can create anything from a flat mosaic to a complex 3D structure. It's a brilliant way to teach children how a simple component can be the foundation for endless possibilities.

5. Arrange the Shapes

Before introducing complex building sets like LEGO, start with something bigger. You can begin with simple, everyday objects like empty food boxes or different-sized plastic bowls, which helps a child begin to recognize sizes and shapes.

When they are ready for the next step, introduce a set of large, soft building blocks. Choose blocks with attractive shapes and colors. Because they are soft, they are safe for toddlers, and their large size makes them easy for little hands to stack, build, and knock down without frustration.

6. Puppet Plays

What little kid doesn't love puppets? This activity is a powerhouse for developing communication skills.

Start by being the puppeteer yourself. Make the puppet "talk" with a funny voice, allowing your child to learn to recognize sounds and story structure. As they get a bit older, give them a puppet and invite them to join the show. Invite them to talk through the puppet. You'll be amazed at the stories they create and the confidence they build.

As you can see, preparing educational and fun activities for your child doesn't have to be expensive or complicated. Enjoy this precious bonding time

A Complete Guide to Your Baby's First Solid Foods

After six months of exclusive breastfeeding or formula feeding, a baby's nutritional needs begin to change. While breastmilk or formula remains their primary source of nutrition, it's time to introduce solid foods. This is an exciting, messy, and incredibly important new chapter in your baby's development.

Signs Your Baby is Ready for Solid Food

Around the 6-month mark, your baby will start giving you clear signals that they are ready for their first foods. Look for these signs of readiness:

  • Good Head Control: They can hold their head up steadily without support.

  • Sits Up Well: They can sit upright with minimal assistance.

  • Shows Interest in Food: They watch you eat with fascination, look at the food on your plate, and may even try to reach for it.

  • Loses the Tongue-Thrust Reflex: They no longer automatically push food out of their mouth with their tongue.

Introducing solids at the right time is key. Too early, and it can interfere with their milk intake; too late, and it can be more difficult for them to accept new textures and may lead to nutritional gaps.

babyLedFood-496120914-770x553-650x428.jpg

What Are the Best First Foods for My Baby?

The journey into solid foods happens in stages. Start slowly and introduce new foods one at a time.

Stage 1: Soft Purées and Mashed Foods

Begin with single-ingredient purées that are soft and easy to swallow. The choices can be iron-fortified baby cereal mixed with breastmilk or formula, or simple mashed foods.

  • Vegetables: Mashed sweet potato, pumpkin, carrots, or peas.

  • Fruits: Mashed banana, avocado, or unsweetened applesauce or pear sauce.

It's recommended to offer a variety of foods rather than just rice cereal to ensure a broad range of nutrients.

Stage 2: Finger Foods for Self-Feeding

Once your baby is comfortable with purées, you can introduce finger foods. These are foods cut into small, graspable pieces that allow your baby to practice self-feeding. Initially, your baby will learn to hold the food and bring it to their mouth. By 8-10 months, they will become much more adept at it.

  • Great finger food options include: Small, soft pieces of banana, avocado, well-cooked pasta, soft cheese, or steamed and softened carrot sticks.

Stage 3: Advanced, More Complex Meals

Once your baby has successfully mastered the first two stages, they can move on to more complex foods and textures. These are foods similar to what the rest of the family is eating, just prepared safely for a baby.

  • Safe options include: Shredded chicken or meat, scrambled or hard-boiled eggs, small pieces of bread, and well-cooked rice. Always ensure the food is soft enough for your baby to mash with their gums to avoid choking.

Building a Healthy Mealtime Routine

  • Learning to Drink from a Cup: After six months, you can start offering water in an open cup or a straw cup. This helps develop their drinking skills and is better for their long-term dental health than sippy cups with hard spouts.

  • Moving to Three Meals a Day: At first, one or two small "meals" a day is plenty. By 8-9 months, you can start offering food three times a day. By their first birthday, most babies are eating three meals a day plus one or two small snacks, just like the rest of the family.

Best Practices for a Happy Feeding Journey

Applying these methods can help you give your baby a positive introduction to food.

  • Choose the Right Moment: Offer food when your baby is in a happy mood—not too hungry, tired, or fussy.

  • Embrace the Mess: Let your baby enjoy touching and holding their food. This sensory play is a crucial part of their learning process.

  • Encourage Independence: When your baby shows an interest in eating alone, give them the chance to use their hands or a baby-safe utensil.

  • Be Patient and Never Force It: Your job is to offer healthy food; your baby's job is to decide how much to eat. Never force your baby to finish a meal.

  • Keep Up with Milk: Continue to breastfeed or formula-feed on demand. Milk is their main source of nutrition for the first year.

  • Always Supervise: Stay with your baby during all meals to monitor for any signs of choking.

  • Check the Temperature: Ensure any food you serve is clean, fresh, and cooled to a safe temperature.

95ee6fdd24b5f05916674c96985e5981.jpg

Your Baby's First Year: A Guide to 10 Major Developmental Milestones

The first year of a baby's life is a whirlwind of incredible growth. Many important developmental stages are achieved in these first 12 months. While babies throughout the world experience the same stages of development, they each reach them at their own unique time.

So, what kind of amazing abilities will your baby develop from 0-12 months? Here are 10 major milestones to watch for.

10 Milestones in Your Baby's First Year

1. The First Real Smile

After about two months of sleepless nights and endless crying, you get the ultimate reward: your baby’s first real, social smile. They'll start responding to the familiar sound of your voice or your silly faces with a heart-melting grin.

2. The First Laugh

If you are getting tired of just coos and cries, be patient! Around the 4-month mark, your little one will begin to make another, even more delightful sound: laughter! Get ready to play endless games of "peek-a-boo" just to hear that joyous giggle.

3. Sleeping Through the Night

This might be the milestone that new parents await more than any other. While every baby is different, many infants develop the ability to sleep for a long, consistent stretch overnight between 4 and 6 months of age. Hang in there, parents!

4. Rolling Over

Around 4 to 6 months, your baby will likely master their first major motor skill: rolling over. They usually learn to roll from their tummy to their back first. This is their first taste of independent movement and a sign that you'll need to start being extra vigilant during diaper changes!

5. Sitting Up Unassisted

Between 6 and 7 months, your baby will likely develop the core strength to sit up all by themselves. This is a huge game-changer, as it frees up their hands to play and gives them a brand new, upright perspective on the world around them.

6. Trying Solid Foods

The adventure of eating begins at around 6 months! This is when you can start introducing solid foods and letting your baby explore a whole new world of tastes and textures. It's a fun, messy, and essential part of their development.

7. Crawling

Get ready—your baby is on the move! Between 7 and 10 months, most babies start crawling. Whether they do a classic crawl, a "scoot," or an army crawl, this newfound mobility means your little one will be exploring every corner of the house. Time to baby-proof!

8. Pulling Up to Stand

After mastering life on the floor, your baby will look for new heights. Around 9 to 10 months, you'll likely find them using furniture (and your legs) to pull themselves up to a standing position. This is a clear sign that they are building the strength and coordination needed for their first steps.

9. Mastering the Pincer Grasp

Around 9 to 12 months, your baby will refine their fine motor skills by mastering the "pincer grasp"—the ability to pick up small objects between their thumb and forefinger. This is a critical skill for self-feeding small snacks like puffs or peas.

10. Saying the First Words

Perhaps the most anticipated milestone of all! Around their first birthday, many babies will say their first word, which is very often "mama" or "dada." Hearing your baby call for you by name for the first time is a truly unforgettable moment.

Remember, every baby is unique and will reach these milestones on their own timeline. The most important thing is to celebrate each new achievement and enjoy the incredible journey of their first year. If you ever have concerns about your child's development, don't hesitate to speak with your pediatrician.

A child must know that he is a miracle, that since the beginning of the world there hasn’t been, and until the end of the world there will not be, another child like him.
— Pablo Casals
36148038_441744876289194_6390680950107275264_n.jpg

A Parent's Guide to Self-Feeding: Why It's Worth the Mess

As a new parent, your instinct is to be protective. You worry about choking, so you might prefer to feed your child yourself. While every parent has a different perspective, let's discuss the incredible importance of allowing children to be in charge of their own feeding and learn how to listen to their bodies.

This approach, often called Baby-Led Weaning (BLW), can be messy. But this article will show you why you should empower your little one to self-feed—and why it is absolutely worth the mess.

Why is Self-Feeding Worth the Mess?

Learning to eat alone is a critical skill that should be encouraged early. When a child is able to grasp something, letting them explore food with their hands stimulates their development in profound ways.

  • Develops Fine Motor Skills: The act of learning to grab food and put it in their mouths strengthens the small muscles in their hands and fingers. This is the same dexterity they will later use for other positive activities like coloring, drawing, and writing. The more they practice, the stronger those muscles become.

  • Improves Hand-Eye Coordination: Self-feeding requires your baby to see their food, use their hands to pick it up, and guide it successfully to their mouth. This is a complex task that builds crucial coordination.

  • Encourages a Healthy Relationship with Food: Allowing a baby to control their own intake helps them learn to listen to their body's hunger and fullness cues. It gives them a sense of autonomy and can lead to them being more adventurous eaters in the long run.

When is a Good Age to Start Self-Feeding?

Once you introduce solid foods (around 6 months), your child will likely start showing signs of wanting to feed themselves. When your child is able to sit up unassisted and can successfully pick up food and get it into their mouth, it's the right time to begin the transition.

Self-feeding involves lots of feeling, squeezing, and dropping food. It might seem chaotic, but it’s one of the primary ways your child develops essential skills.

How to Start Your Baby's Self-Feeding Journey

Step 1: Start with Hands and Finger Foods

Baby-Led Weaning encourages letting your child explore food with all their senses. Start by offering soft, bite-sized pieces of food that are easy for your baby to pick up and mash between their gums. Think small pieces of soft fruit like banana or avocado, or soft-cooked vegetables like potatoes or pumpkin.

At this stage (around 6 months), finger foods are for exploration, not their main source of nutrition, so you should continue breastfeeding or formula feeding as usual. You'll find that once they become interested in the textures and tastes of food, the journey to self-feeding becomes much easier.

Step 2: Introducing the Right Kind of Utensils

There's no right or wrong time to introduce utensils, but it's the next logical step in their development. The key is to use utensils that are actually made for a baby's hands and abilities.

Traditional children's cutlery often looks like adult cutlery, just scaled down. The problem? A "child-size" spoon is often the same length as a 12-month-old's entire forearm! This forces them to hold it in an awkward fist grip, which doesn't help develop the fine motor skills they need.

What to Look for in a Starter Spoon and Fork:

Instead of focusing on a brand, focus on these revolutionary design features endorsed by Occupational Therapists:

  • A Short, Ergonomic Handle: This is the most important feature. A short, wide handle encourages a child's natural vertical grasp, allowing them to hold the utensil properly and bring it to their mouth much more easily.

  • A Choke-Protection Shield: Many of the best starter utensils have a built-in safety shield below the spoon or fork tines. This prevents your baby from accidentally gagging themselves, giving you invaluable peace of mind.

  • Proportional Sizing: The utensil should be sized for a baby's body, not just a smaller version of an adult's.

A Final Word on the Mess

Messy eating and playing with food are normal, healthy parts of your baby’s development. It's also normal for them to drop or throw food. If you react strongly, they might think it's an exciting new game. The best strategy is to ignore it. Calmly pick up the food without a fuss, or simply leave it on the floor until the meal is over so you only have one big clean-up.

Needless to say, teaching children self-feeding is often a long and messy journey. Just let the food fly!!
— The Real Nutritionist

A Parent's Guide to Building Blocks by Age: The Benefits of Block Play

Editor's Note:

As part of our commitment to providing timeless, valuable advice, this popular article has been updated to be a general guide on choosing age-appropriate building blocks. The specific brand examples have been replaced with descriptions of the types of blocks that best serve each developmental stage.

To explore our current collection of high-quality, creative building toys from our trusted brand partners, please click here.


Building blocks have been a childhood staple for decades, and for good reason. Building with blocks provides one of the most valuable learning experiences available for young children. Block play stimulates learning in all domains of development—intellectual, physical, and social-emotional—and, most importantly, allows a child's imagination to run free.

Researchers have even shown that children who play with blocks when they are three, four, and five years of age tend to perform better in math, especially Algebra, later in middle school.

Building Blocks for Kids at Different Ages

With so many types of baby blocks on the market, how do you know which kind is right for your child? Not all blocks will work for all age groups. There is a natural progression to block play, and introducing them at each stage is invaluable for development.

Blocks Play for Babies (3 to 12 months old)

When babies are first introduced to blocks, the play is all about sensory exploration. They are learning how to hold them, feeling their texture, and are attracted by their eye-catching colors. They will carry them around, bang them together to see what sound they make, and, of course, put them in their mouths. This simple play expands a young child’s expressive and receptive language as they learn new words and concepts.

Recommended Blocks for this Age: Soft Silicone Blocks
For this stage, choose blocks made from soft, food-grade silicone. These are perfect because they can double as a teether, which is great for itchy gums. This also helps the child learn the crucial hand-to-mouth movement needed for self-feeding. The different colors encourage visual stimulation and color recognition, making them an ideal first toy for all-around development.

Blocks Play for Toddlers (2 to 3 years old)

At this age, the aim of play shifts to developing the mind: to imagine, visualize, explore, and create. A two or three-year-old is beginning to engage in early pretend play and is learning concepts like sorting, ordering, counting, size, and shape.

Recommended Blocks for this Age: Large, Lightweight Interlocking Blocks
Look for blocks made from soft but sturdy foam or plastic. They should be lightweight enough for a toddler to handle easily but firm enough that their creations don't tumble over too often, which can cause frustration. Colorful visuals and a comfortable touch are key. These blocks should be durable, easy to clean, and safe, allowing kids to have fun while stimulating creativity and imagination.

Blocks Play for Preschoolers (4 to 5 years old)

By four and five, children's block play becomes more experienced, balanced, and organized. Constructive play is more open-ended and exploratory. Children begin to combine different structures to make more complex buildings, telling stories through their creations.

Recommended Blocks for this Age: Smaller, Complex Construction Sets
Introduce smaller, more intricate interlocking blocks. These types of sets emphasize how a single, simple shape can be used to create an infinite variety of things. They are perfect for teaching children how to translate a flat, 2D design into a 3D structure. This challenges their fine motor skills, encourages problem-solving, and takes their creativity to the next level.

50015893_370619580417705_5606032701099285469_n.jpg
Play is the highest form of research.
— Albert Einstein

Baby Teething 101: A Parent's Guide to Teethers, Symptoms & Pain Relief

Teething can be one of the least fun parts of early development. Symptoms vary widely, but for many babies, it can mean lost sleep, crying in pain, and rashes from constant drooling. As a parent, you'll naturally start thinking about giving your baby a teether. But this brings up a lot of questions: When is the right time? Does my baby really need one? And with so many options, what kind of teether should I choose?

This guide will walk you through everything you need to know.

Does My Baby Really Need a Teether?

While some lucky babies seem to sail through teething without much fuss, for most, growing teeth causes pain and discomfort. You may notice your baby crying more, producing a lot more saliva, and acting nervous or fussy, especially at night.

This is where teething toys become beneficial. Not only do they help relieve a baby’s pain by providing a safe, satisfying surface to chew on, but they also support cognitive development. The simple act of using a teether helps a baby practice crucial motor skills: they must see the toy, coordinate their hands to grab it, and guide it into their mouth.

When Should I Give My Baby a Teether?

If you notice your little one trying to chew on everything in sight—their hands, your shirt, the remote—it's probably time to introduce a teether.

Teething can start as early as 3 months old or as late as 14 months. The exact timing and which teeth appear first often depend on family history and genetics. Typically, the two lower front teeth are the first to emerge, followed by the two upper front teeth. Most children will have their full set of 20 primary teeth before they turn 3 years old.

How to Choose the Perfect Teether for Your Baby

A good quality teething toy should be durable, BPA-free, easy for your baby to hold, and safe to chew on, with no hard or sharp edges. Instead of thinking in "stages," it's more helpful to think about the teether's material, shape, and function.

1. Materials Matter

  • Silicone: This is the most popular choice for a reason. 100% food-grade or medical-grade silicone is soft, flexible, durable, and free from harmful chemicals. It's also easy to clean and can often be chilled for extra relief.

  • Natural Rubber: Made from the sap of rubber trees, this is another excellent, non-toxic option. It has a natural elasticity and softness that babies love.

  • Wood: Unfinished, smoothly sanded wood (like maple) is a great natural, non-toxic, and naturally antimicrobial option.

2. Shape and Function

  • Rings and Simple Shapes: These are classic for a reason. They are easy for the youngest babies to grasp and maneuver into their mouths.

  • Ergonomic Handled Teethers: Many modern teethers have fun shapes with built-in handles, making them incredibly easy for little hands to hold securely. This helps babies build independence.

  • Teethers with Bristles: Some teethers have soft silicone bristles that act as a gum massager and a gentle introduction to the sensation of a toothbrush.

  • Teethers that can be Chilled: Any solid silicone teether is safe to put in the refrigerator (never the freezer, as it can get too hard and damage gums) for cooling relief on inflamed gums.

3. Hygiene and Convenience

  • Look for teethers that are easy to clean (dishwasher-safe is a huge plus!).

  • Consider teethers that come with a travel case or have a "flip" design to keep the chewing surfaces clean inside a diaper bag.

  • A teether that can attach to a pacifier clip is a lifesaver for preventing it from constantly falling on the floor.

Safety First: A Non-Negotiable Rule

Always supervise a baby while they are using a teether. When choosing one, make sure it is large enough that they cannot fit the entire thing in their mouth.

Crucially, do not use items that are not meant to be teethers. Toys with small parts that could fall off are a serious choking hazard. Never use teething necklaces or amber beads, as they pose a risk of strangulation and choking. Stick to products specifically designed and safety-tested for teething. And don’t forget to regularly inspect and clean your baby’s teethers!

The Ultimate Guide to Choosing a Teether for Teething Pain Relief

Editor's Note:

Please be aware that BabyLux no longer distributes Matchstick Monkey products. This popular article has been updated to serve as a definitive guide on what to look for when choosing the most effective teether to soothe your baby's teething pain.


When your baby is suffering from teething pain, you'll do anything to find a solution. Many of the best and most innovative baby products are born from a parent's direct experience—a mom or dad who couldn't find the perfect tool and decided to create it themselves. This is especially true in the world of teethers.

With so many choices on the market, it can be overwhelming for parents to decide which product is best. While all teethers are designed to soothe sore gums, they come with different features. This guide will help you understand what to look for to find the perfect solution for your little one.

The Ultimate Teether Checklist: What to Look For

To find a teether that is both effective and loved by your baby, look for these key features.

1. Ergonomic Design for Little Hands

A teether should be easy for a baby to hold and manipulate. Look for ergonomically designed products that are lightweight and have handles or shapes perfectly suited for tiny hands. This helps your baby develop motor skills while empowering them to soothe themselves.

2. Doubles as a Teething Gel Applicator

This is a game-changing feature. Some of the most innovative teethers have small, soft bumps on the back of their fun shapes. These bumps are not only great for providing a satisfying texture to chew on, but they are also perfectly designed to hold a small amount of teething gel or granules. This allows you to administer teething medication accurately and painlessly, getting it right to the source of the pain without getting your fingers bitten.

3. Advanced Hygienic Properties

In today's world, hygiene is more important than ever. Look for teethers made from food-grade silicone that incorporates antimicrobial technology. This helps keep the teether hygienically cleaner between washes, inhibiting the growth of microbes and giving parents extra peace of mind.

4. Engaging and Fun Sensory Design

A teether should appeal to your child! Deep colors, satisfying shapes, and playful expressions are all designed to engage your baby's senses. A fun, "Instagrammable" design that looks cute with every outfit is a wonderful bonus that makes a practical item feel special.

How Do I Safely Clean a Silicone Teether?

Proper cleaning is essential. The best teethers are designed to be incredibly easy to clean. For any teether made of 100% FDA-approved, food-grade silicone, you should be able to:

  • Wash it with simple soap and hot water.

  • Place it in the top rack of the dishwasher.

  • Sanitize it in a steam or cold water sterilizer.

Always ensure the teether is BPA-free and made from non-toxic, environmentally friendly materials.

230318_jacobmcfadden_originalteether_lowres_009.jpg

Does Your Baby Need a Pacifier? The Pros, Cons, and How to Choose

Every parent has a unique perspective on pacifiers. Some see them as an essential tool for soothing a fussy baby, while others worry about potential issues like "nipple confusion," a drop in milk supply, or long-term dental problems. So, what's the real story?

Does a Baby Truly Need a Pacifier?

The truth is, it depends on the baby. Some infants are naturally able to soothe themselves, often by sucking on their thumbs or fingers—a habit that can start even before they're born. For many others, the strong, instinctual sucking reflex finds comfort and calm in a pacifier.

The American Academy of Pediatrics offers guidance for breastfeeding mothers. To avoid any potential nipple confusion, they suggest waiting until your baby is breastfeeding well and your milk supply is established, which is often around your baby’s one-month birthday. If nursing is going well and your baby is gaining weight on a regular schedule, you can give them a pacifier after feedings to satisfy their need to suck without interfering with nourishment.

The Surprising Benefits of Using a Pacifier

While soothing a fussy baby is the most obvious benefit, it's not the only one.

  • Reduced Risk of SIDS: Research by the American Academy of Pediatrics has shown that giving infants a pacifier at nighttime and for naps can help reduce the risk of Sudden Infant Death Syndrome (SIDS). The protective effect is still present even if the baby spits the pacifier out after falling asleep.

  • A Habit That's Easier to Break: A pacifier habit is often easier to manage and eventually break than a thumb-sucking habit. After all, you can't misplace a thumb, but you can decide when a pacifier is no longer needed.

  • Parental Peace of Mind: As a new parent, comforting your baby is a top priority. A pacifier can be an invaluable tool for calming your little one, which in turn helps calm you.

The only time pacifier use might be restricted is if a child is particularly prone to ear infections, as constant sucking can sometimes interfere with ear tube drainage.

How to Choose the Best Pacifier for Your Baby

When it's time to choose a pacifier, focus on these key features rather than just a brand name.

1. Construction and Material

Look for pacifiers with a one-piece construction, as these are the safest. There are no separate parts that could break off and become a choking hazard. The best material is 100% medical-grade or food-grade silicone that is soft, durable, and free of BPA and other harmful chemicals.

2. Nipple Shape

You will generally find two types: a classic, rounded nipple and an orthodontic nipple. Orthodontic pacifiers are specially shaped—flattened on the bottom and rounded at the top—to support the natural development of your baby's palate and jaw.

3. Shield Design

The shield is the part that rests against your baby’s face. It should be large enough that your baby cannot fit the entire pacifier in their mouth. Crucially, it must have ventilation holes to allow for air circulation. Some modern designs are even handle-free to prevent a baby from getting distracted.

4. Compatibility with Accessories

For convenience, consider a pacifier that is compatible with a holder or clip. Paci-plushies (a pacifier attached to a small stuffed animal) can make the pacifier easier for a baby to find and hold on their own.

When Is It Time to Say Goodbye to the Binky?

To avoid potential dental effects, it's best to start phasing out the pacifier once your child is around two or three years old. While significant changes to the jawbone typically don't begin until age four, it's always a good idea to discuss your child's pacifier use with your dentist during regular check-ups.

A Parent's Guide to Safe & Stylish Teethers: Why Silicone is Best

Editor's Note:

Please be aware that BabyLux no longer distributes Loulou LOLLIPOP products. We have updated this article to serve as a comprehensive guide on selecting safe, effective, and stylish teething accessories for your baby.


Modern baby goods are being redefined by a new standard: the pursuit of better, cuter, and safer products for every newborn adventure. When it comes to teething, this means a new generation of teethers and pacifier clips that are as stylish and fun as they are safe and soothing.

Gone are the days of boring teething rings. The industry has evolved, with parent-led innovation creating adorable, "chewable" designs that look as good as they feel on a baby's sore gums. The first of their kind were strong, durable, and delightful, shaped like tasty treats such as donuts and ice cream cones, proving that teething accessories could be both effective and incredibly cute.

What Makes a Teether 100% Safe for Your Baby?

When your little one is putting something in their mouth, safety is the number one priority. A truly safe teether is one that is completely free from nasty chemicals. Here is what you should always check for on the product label:

  • 100% Food Grade Silicone: This is the gold standard for teething products. It is non-toxic, durable, and soft on gums.

  • Free from Harmful Chemicals: Ensure the product is explicitly listed as BPA-free, Phthalate-free, Lead-free, Cadmium-free, and PVC-FREE.

  • Original, Safe Designs: Look for products from reputable brands that focus on creating safe, modern designs for babies.

A great tip for extra relief is that many silicone teethers can be chilled in the refrigerator (never the freezer!) to provide cool comfort for teething pain.

How to Properly Clean Silicone Teethers and Pacifier Clips

Silicone is a naturally antimicrobial material, which makes cleaning simple and effective. However, there are important rules to follow to ensure the product's integrity, especially for items with clips or multiple parts.

  • DO wash thoroughly. Before the first use and after each subsequent use, wash with warm, soapy water. This is sufficient to clean the teether or clip.

  • DO NOT sterilize or boil your pacifier clip. The high heat can damage the metal or plastic clip mechanism, making it unsafe.

  • DO NOT microwave your clip for the same reason; it can compromise the clip's components.

The Must-Have Accessory: The Pacifier Clip

A good pacifier clip is one of the most useful accessories for parents on the go. These clips attach securely to clothes, blankets, strollers, or car seats to hold pacifiers, teething rings, or small toys. They are perfect for keeping your baby's favorite item close by and, most importantly, off the dirty floor.

When choosing one, look for clips made with food-grade silicone beads and a secure clasp, ensuring the total length is safe for baby use (typically around 10 inches including the loop).

A Buyer's Guide: How to Choose the Perfect Teether for Your Baby

Editor's Note:

Please be aware that BabyLux no longer distributes Hashtag Kidz products. We have updated this article to serve as a helpful guide for parents and retailers on the key features to look for when selecting a safe, effective, and hygienic teether.

To explore our current collection of expert-selected, high-quality products from our trusted brand partners, please click here.


Teething is a major milestone, but it can be a tough time for both babies and parents. As your little one starts to experience sore gums, a high-quality teether becomes an essential tool. But with so many options on the market, how do you choose the right one?

Driven by a need for thoughtful functionality and innovative design, the best baby products are often born from parents' own experiences. When it comes to teethers, this means moving beyond a simple piece of plastic to create an "all-in-one" solution that is safe, soothing, and easy for parents to manage.

The Checklist for the Perfect Teether

Look for products that are friendly to the planet and, most importantly, safe for your baby. Here are the key features that parents and kids love, and what you should look for when making your choice.

1. Safety First: Material Matters

The first consideration should always be safety. Look for teethers made from 100% food-grade silicone. This material is soft, durable, and free of any harmful toxins like BPA, PVC, or phthalates. It's gentle on your baby's gums and gives you peace of mind.

2. Designed for Tiny Hands

A teether is only effective if your baby can use it. Look for easy-grip handles that are ergonomically designed for tiny hands to hold securely. This empowers your baby to soothe themselves independently.

3. Soothing Textures, Bumps, and Grooves

The primary job of a teether is to provide relief. The best designs feature a variety of textured surfaces. These fun-to-chew bumps and grooves gently massage your baby's gums, providing comfort and sensory stimulation. Bright, engaging colors are also a wonderful feature that can help stimulate your baby and bring a smile to their face.

4. Hygiene on the Go is a Must

Let's be honest: baby items spend a lot of time on the go—and on the floor. A teether designed with hygiene in mind is a game-changer for parents.

Say goodbye to germs!

Look for innovative features that offer double hygienic protection. This can include:

  • An included carrying case to keep it clean in a diaper bag or purse.

  • A clever "flip n' fold" design that covers the teething surfaces when not in use.

  • A handle that can easily be attached to a pacifier holder to prevent it from being dropped.

5. Easy to Clean

A teether should be simple to clean. Food-grade silicone makes this easy, as most are dishwasher safe or can be quickly washed with soap and water.

An award-winning teether is often one that successfully combines all these elements into a single, smart product. By prioritizing safety, ergonomics, and hygiene, you can find the perfect all-in-one teether to help your baby (and you!) get through the teething phase.

Hashtag Kidz ChewBuddy, world's first on-to-go teether

Sippy Cup vs. Straw Cup: Which is Better for Your Baby's Development?

Editor's Note:

Please be aware that BabyLux no longer distributes Lollacup products. We have updated this article to serve as a comprehensive guide to help parents navigate the transition from a bottle to a cup, a key developmental milestone.

To explore our current selection of high-quality products from our trusted brand partners, please click here.


As your baby grows, one of the big transitions is moving away from the breast or bottle. For years, the traditional spill-proof sippy cup was the go-to choice. However, many parents find that their babies struggle to sip from these cups. More importantly, a growing number of experts are recommending a different tool for this important milestone: the straw cup.

Learning to drink from a straw helps babies develop the muscles in and around their face and mouth. These are the same muscles that are crucial for developing skills in biting, chewing, and eventually, talking.

The Great Debate: Sippy Cup or a Straw?

If you conduct a basic internet search, you'll find a slew of articles from speech and language pathologists, pediatricians, and dentists recommending straw cups over traditional sippy cups.

The reason is simple and it's all about tongue position. With a straw cup, a baby learns the mature skill of pulling their tongue to the back of their mouth when they drink. Conversely, many sippy cups with hard spouts encourage a less mature, bottle-like sucking pattern where the tongue stays forward. Promoting a mature swallowing pattern is beneficial for oral development and can help with the transition to clear speech.

What to Look for in a High-Quality Starter Straw Cup

When you're ready to make the switch, not all straw cups are created equal. Here's a checklist of what to look for to ensure you're getting a functional, safe, and easy-to-use cup for your toddler:

  • Weighted Straw: This is a key feature! A weighted end allows the straw to follow the liquid, so your child can drink from any angle without frustration.

  • Valve-Free Straw: While valves prevent spills, they can make it difficult for a new learner to get liquid out. A non-valved straw is often easier for babies to master.

  • Safety First Materials: Ensure the cup is made from FDA-approved materials and is explicitly free from BPA/BPS, PVC, and Phthalates.

  • Easy to Clean: Look for cups with minimal parts that are easy to assemble and disassemble. A cup that comes with its own straw-cleaning brush is a huge plus for hygiene.

  • Right Size: A cup that holds around 200-300 ml (7-10 oz) is typically a great starting size for toddlers.

  • Handles: Easy-to-grip handles help little hands hold the cup securely, promoting independence.

How to Teach Your Baby to Drink From a Straw

While some babies take to a straw instantly, others need a little practice. Try this gentle method:

  1. Dip the bottom of the straw into a cup with water or milk.

  2. Place your finger over the top end of the straw to trap the liquid inside.

  3. Bring the bottom of the straw to your baby's mouth and release your finger, letting a small amount of liquid flow in. This shows them that liquid comes from the straw.

  4. After a few tries, offer them the cup. They should instinctively begin to seal their lips and suck.

Be patient! While some little ones get the hang of it around 9-12 months, others might master the skill closer to 18 months. Every child learns at their own pace.

Ready to Make the Transition?

Choosing the right cup can make the transition from the bottle smoother for your baby and support their healthy oral development.

Hi Lollacup, the modern straw cup! Bye-bye to sippy cup!

The Rise of Open-Ended Toys: Why Silicone is a Parent's Top Choice

Editor's Note:

Please be aware that as of 2025, BabyLux no longer distributes Dena products. We have updated this popular article to serve as a general guide on the incredible benefits of open-ended silicone toys, a category we are passionate about.

To discover our current collection of high-quality, creative, and safe toys from our trusted brand partners, please click here to visit our toys category page.


In today's world of parenting, there's a growing movement towards toys that spark creativity and imagination rather than limit them. This is the world of "open-ended play," and at its heart is a special kind of toy that parents are increasingly seeking out. These are high-quality, versatile toys that can be used in countless ways, empowering children to play without rules or instructions.

The options are truly endless. A great open-ended toy can be a teether, a stacking game, a sensory tool for children with special needs, a fun accessory for the beach, and even a mold for baking. The magic is that there is no "right" way to play, giving children the freedom to explore.

What Makes Open-Ended Silicone Toys So Special?

These unstructured toys are powerful tools for the early stimulation of babies and the long-term development of a child's imagination. In fact, the best open-ended toys are foundational STEAM toys, integrating concepts from science, technology, engineering, arts, and math in a fun, hands-on way.

A truly great toy should be safe, fun, and above all, creative!

Many parents love the aesthetic of classic wooden toys, but they aren't always ideal for the youngest children. Babies and toddlers instinctively explore with their mouths, and they love to bite, hit, and throw their toys. This is where high-quality, food-grade silicone shines. It's a durable, yet soft and forgiving material that can stand up to the rigors of authentic play, making it a safer choice for little ones.

The Endless Possibilities of a Single Toy

With a set of open-ended silicone toys, what seems simple at first glance becomes a universe of creative possibilities:

  • For Babies: The soft, flexible material is perfect as a safe teether for soothing sore gums.

  • For Toddlers: They become tools for learning cause and effect. Can they be stacked into a tower? What happens when they are knocked down?

  • For Preschoolers: The figures and shapes are integrated into imaginative play. They can become characters in a story, currency in a make-believe shop, or decorations on a sandcastle.

  • For All Ages: The material is often heat-resistant, meaning it can be used as a baking mold for fun-shaped crayons or cookies, and it's dishwasher-safe for easy cleanup.

Parents can have peace of mind that their child, no matter their age, is playing safely, while children thrive on the freedom to let their creativity run wild.

Ready to Inspire Creative Play?

Investing in open-ended toys is an investment in your child's development. They are the toys that will be reached for again and again, growing with your child for years to come.

Explore our curated collection of innovative and safe toys here.

The Ultimate Guide to Baby Product Distribution in Asia: Partnering with BabyLux

In the rapidly growing Asian market, finding a reliable and experienced partner to distribute your baby products is crucial for success. For retailers, sourcing high-quality, innovative, and safe products is key to winning the trust of discerning parents. That's where BabyLux comes in.

For over nine years, BabyLux has been the leading distributor of premium baby, toddler, and maternity products across Asia. We bridge the gap between exceptional international brands and the Asian market, ensuring that the finest products reach families who want nothing but the best.

Our Philosophy: Luxury and Love for Your Little One

At BabyLux, we believe that every baby deserves a touch of luxury. Our name itself stands for "Luxurious Baby," and this philosophy is at the core of everything we do. We meticulously select award-winning international brands from the USA, Canada, and Europe, bringing their exceptional products to the Asian market.

As parents ourselves, we understand the joys and challenges of raising a child. That's why we only distribute products that we would use with our own families. We are committed to making parenting a joyful and stylish experience.

Why Partner with BabyLux?

We are more than just a distributor; we are a dedicated partner in your success. Whether you are a brand owner looking to expand your reach or a retailer seeking the best products for your customers, BabyLux offers unparalleled support and expertise.

For Brand Owners: Your Gateway to the Asian Market

Extensive Sales Network
We provide access to hundreds of our sales channels across Asia, and this number is growing daily.

Local Expertise
We handle the complexities of trademarks, intellectual property rights, and customs issues, saving you time and resources.

International Sales Experience
We understand the cultural nuances of each Asian market, ensuring your brand resonates with local consumers.

Close Retailer Relationships
We have strong connections with local wholesalers, which reduces your management costs and streamlines the entire distribution process.

Valuable Market Insights
We provide crucial feedback from local wholesalers to help inform and refine your global business strategy.

For Local Distributors and Retailers: Your Source for the Best Products

Complete Marketing Support
We provide a comprehensive marketing database and localized campaigns exclusively for our local distributors.

Logistics and Business Advice
We share our extensive international business experience and offer the best logistics support to help you grow.

Flexible Ordering
We offer a uniquely flexible ordering process that sets us apart from other distributors, making it easier for you to manage inventory.

Shared Experience
We connect our network of distributors to share solutions and strategies for common challenges, fostering a supportive community.

Customer Referrals
We actively introduce potential local customers to our trusted local distributors to help drive your sales.

Keeping Up with Today's Parenting Trends

The world of parenting is always evolving, and so are we. We stay ahead of the curve to ensure our portfolio meets the demands of modern parents. Here are some of the key trends we are seeing:

  • Eco-Friendly and Sustainable Products: Today's parents are increasingly conscious of their environmental impact. We are proud to offer a growing selection of sustainable and non-toxic baby products.

  • Smart Baby Tech: From smart monitors to self-rocking bassinets, technology is making parenting easier and more connected. We are at the forefront of this trend, sourcing the latest in baby tech.

  • Minimalist and Aesthetic Designs: Modern parents are looking for baby products that are not only functional but also fit seamlessly into their stylish homes. We specialize in brands that combine beautiful design with exceptional quality.

Join the BabyLux Family

With offices in Hong Kong, China, Korea, Singapore, Malaysia, Japan, and Vietnam, we offer turnkey market access and deep local insights across all major online and offline channels.

We are committed to building fair, transparent, and long-term relationships with our partners. Our goal is to treat everyone with the same respect and care that we would want for ourselves.

Ready to grow your brand in Asia? Contact us today to learn more about a partnership.

Looking for the best baby products for your store? Browse our brands and see what parents are saying about them in our reviews.

 
We believe that “only parents can solve the needs of new parents”, which is why we choose these brands designed by new parents, and hoping to share with you.
— Wendy, Co-Founder of BabyLux
BabyLux - Luxury for your little one

BabyLux - Luxury for your little one