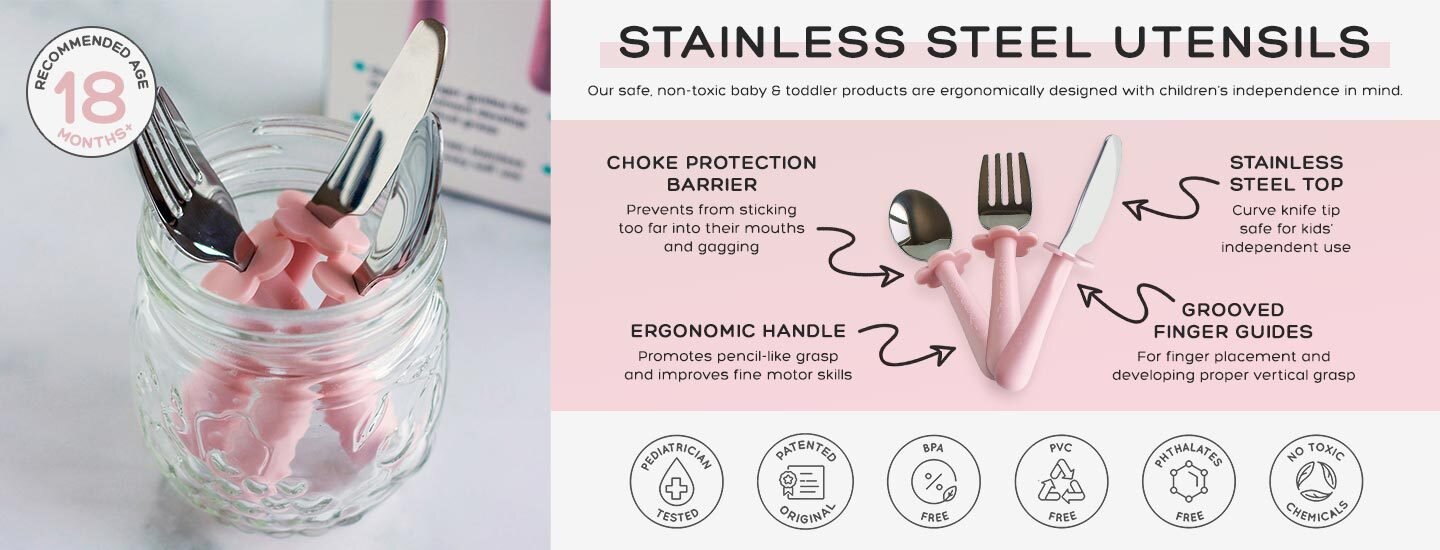
How to successfully let baby using a spoon (with recipes!)
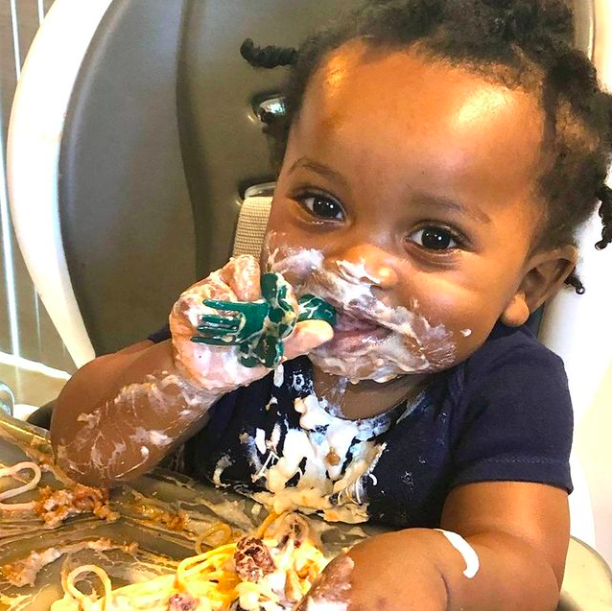
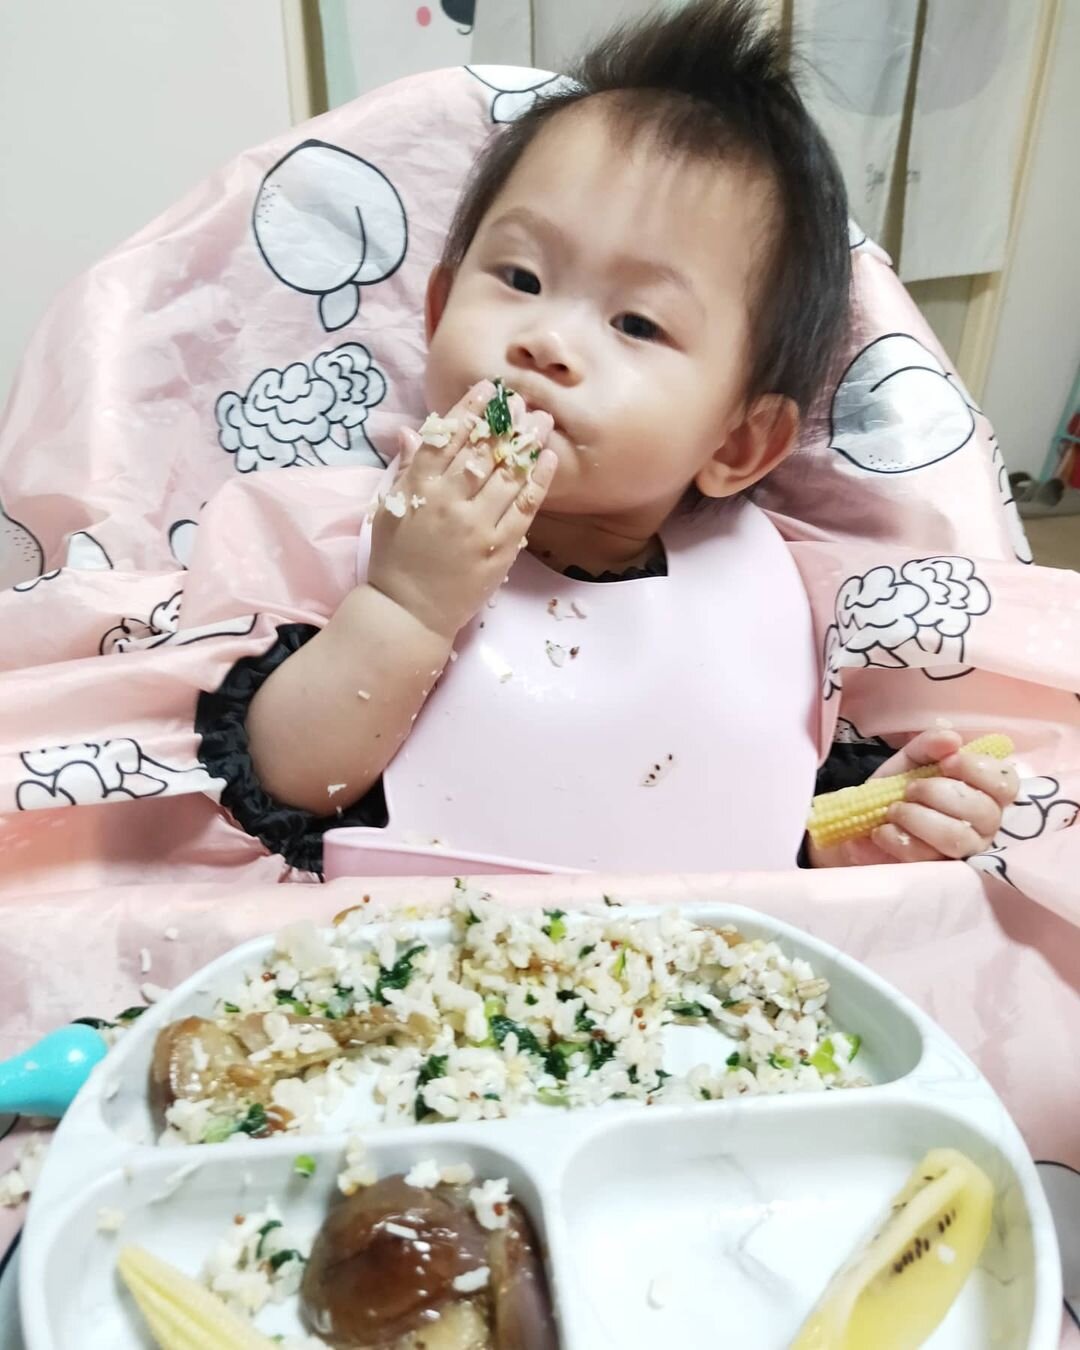
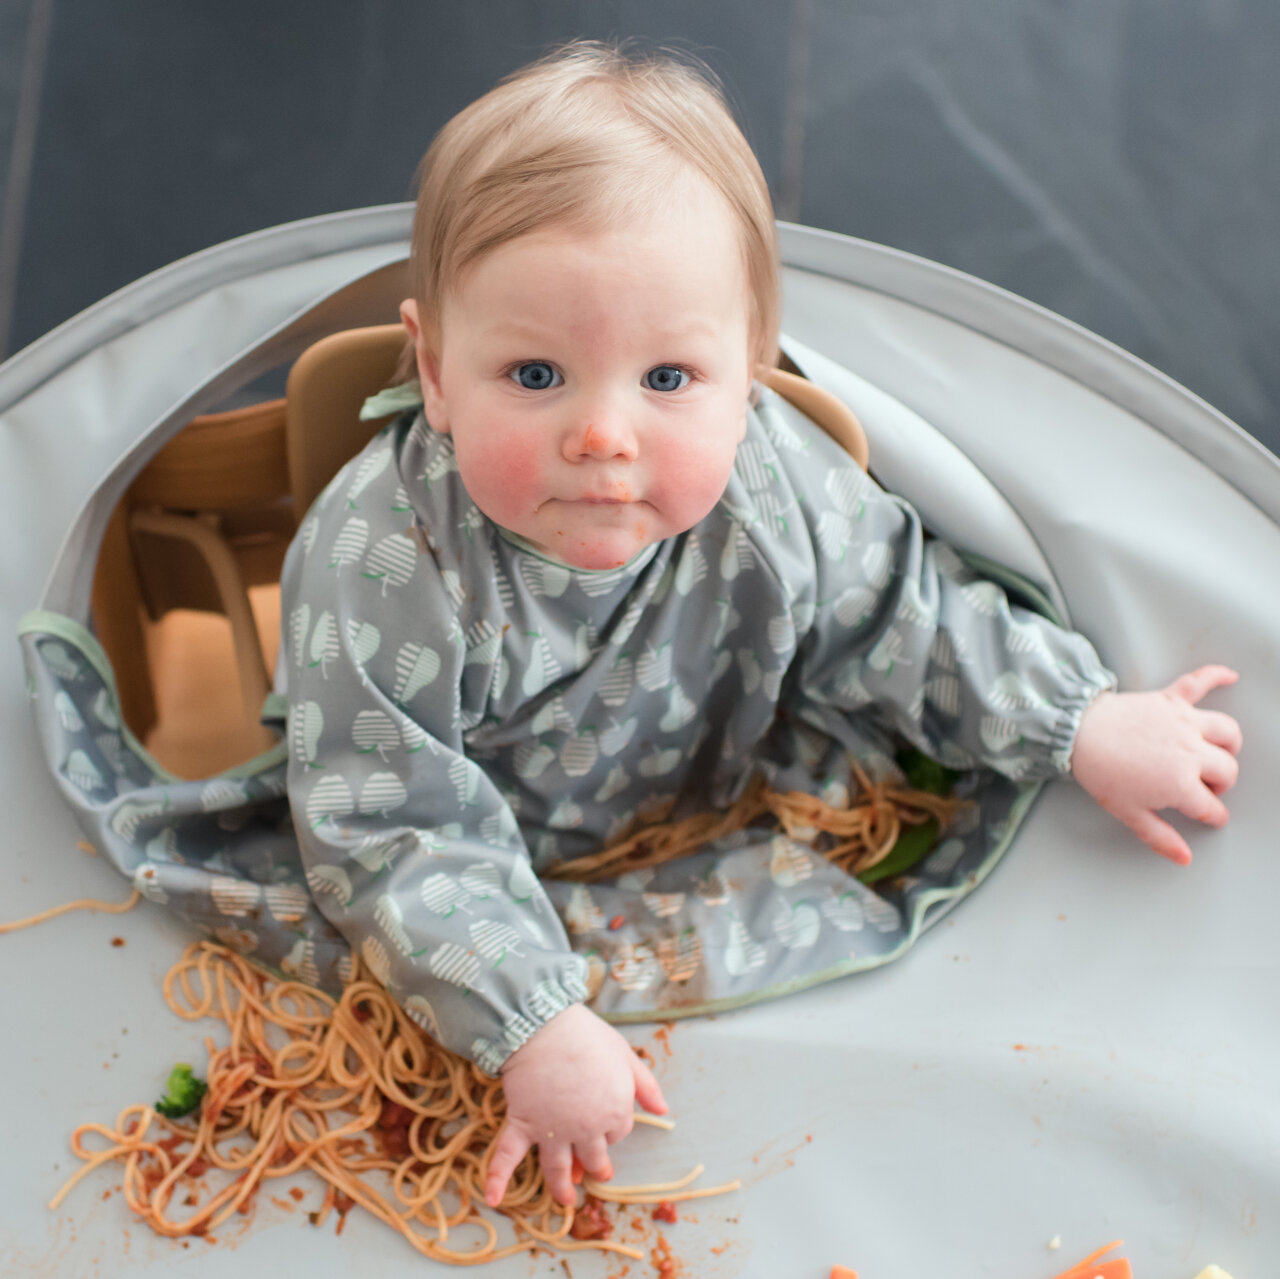
Does your baby love to self-feed with fingers, but isn’t keen on using a spoon?  

While self-feeding using fingers is an important skill, so is learning to use a spoon. It’s a developmental milestone that kids achieve shortly after the 1st year & gain refined skill by age 2. 

Kids may prefer using their fingers because they get feedback through the skin, muscles & joints that helps them feel safe. With a spoon, the feedback is primarily via the lips, tongue & mouth. That’s why it’s so important for babies to go through 2 stages of mouth play: generalized mouthing in infancy & discriminative mouthing at about 4 to 5 months of age. That means baby is gaining the motor skills to intentionally move teethers & toys in her mouth as she explores the shape & texture. Most importantly, she gets to experience exactly how her body responds to that stimuli before food is introduced!

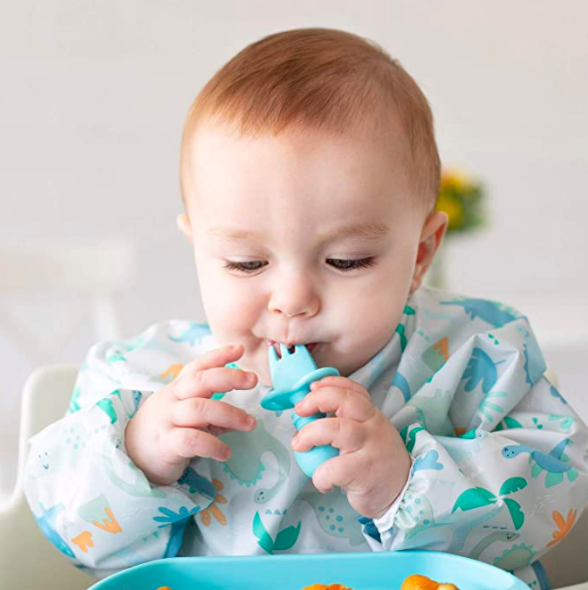
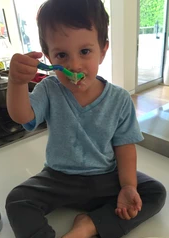
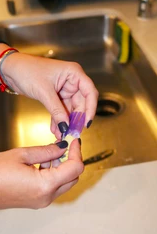
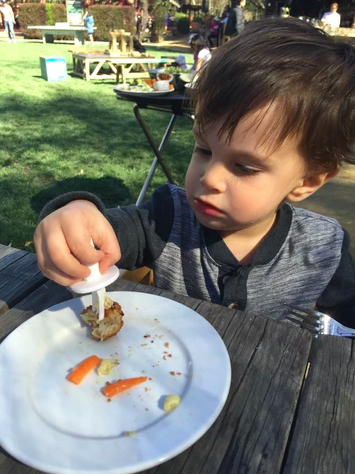
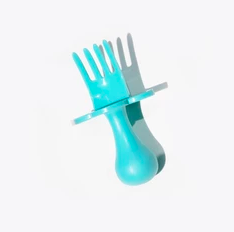
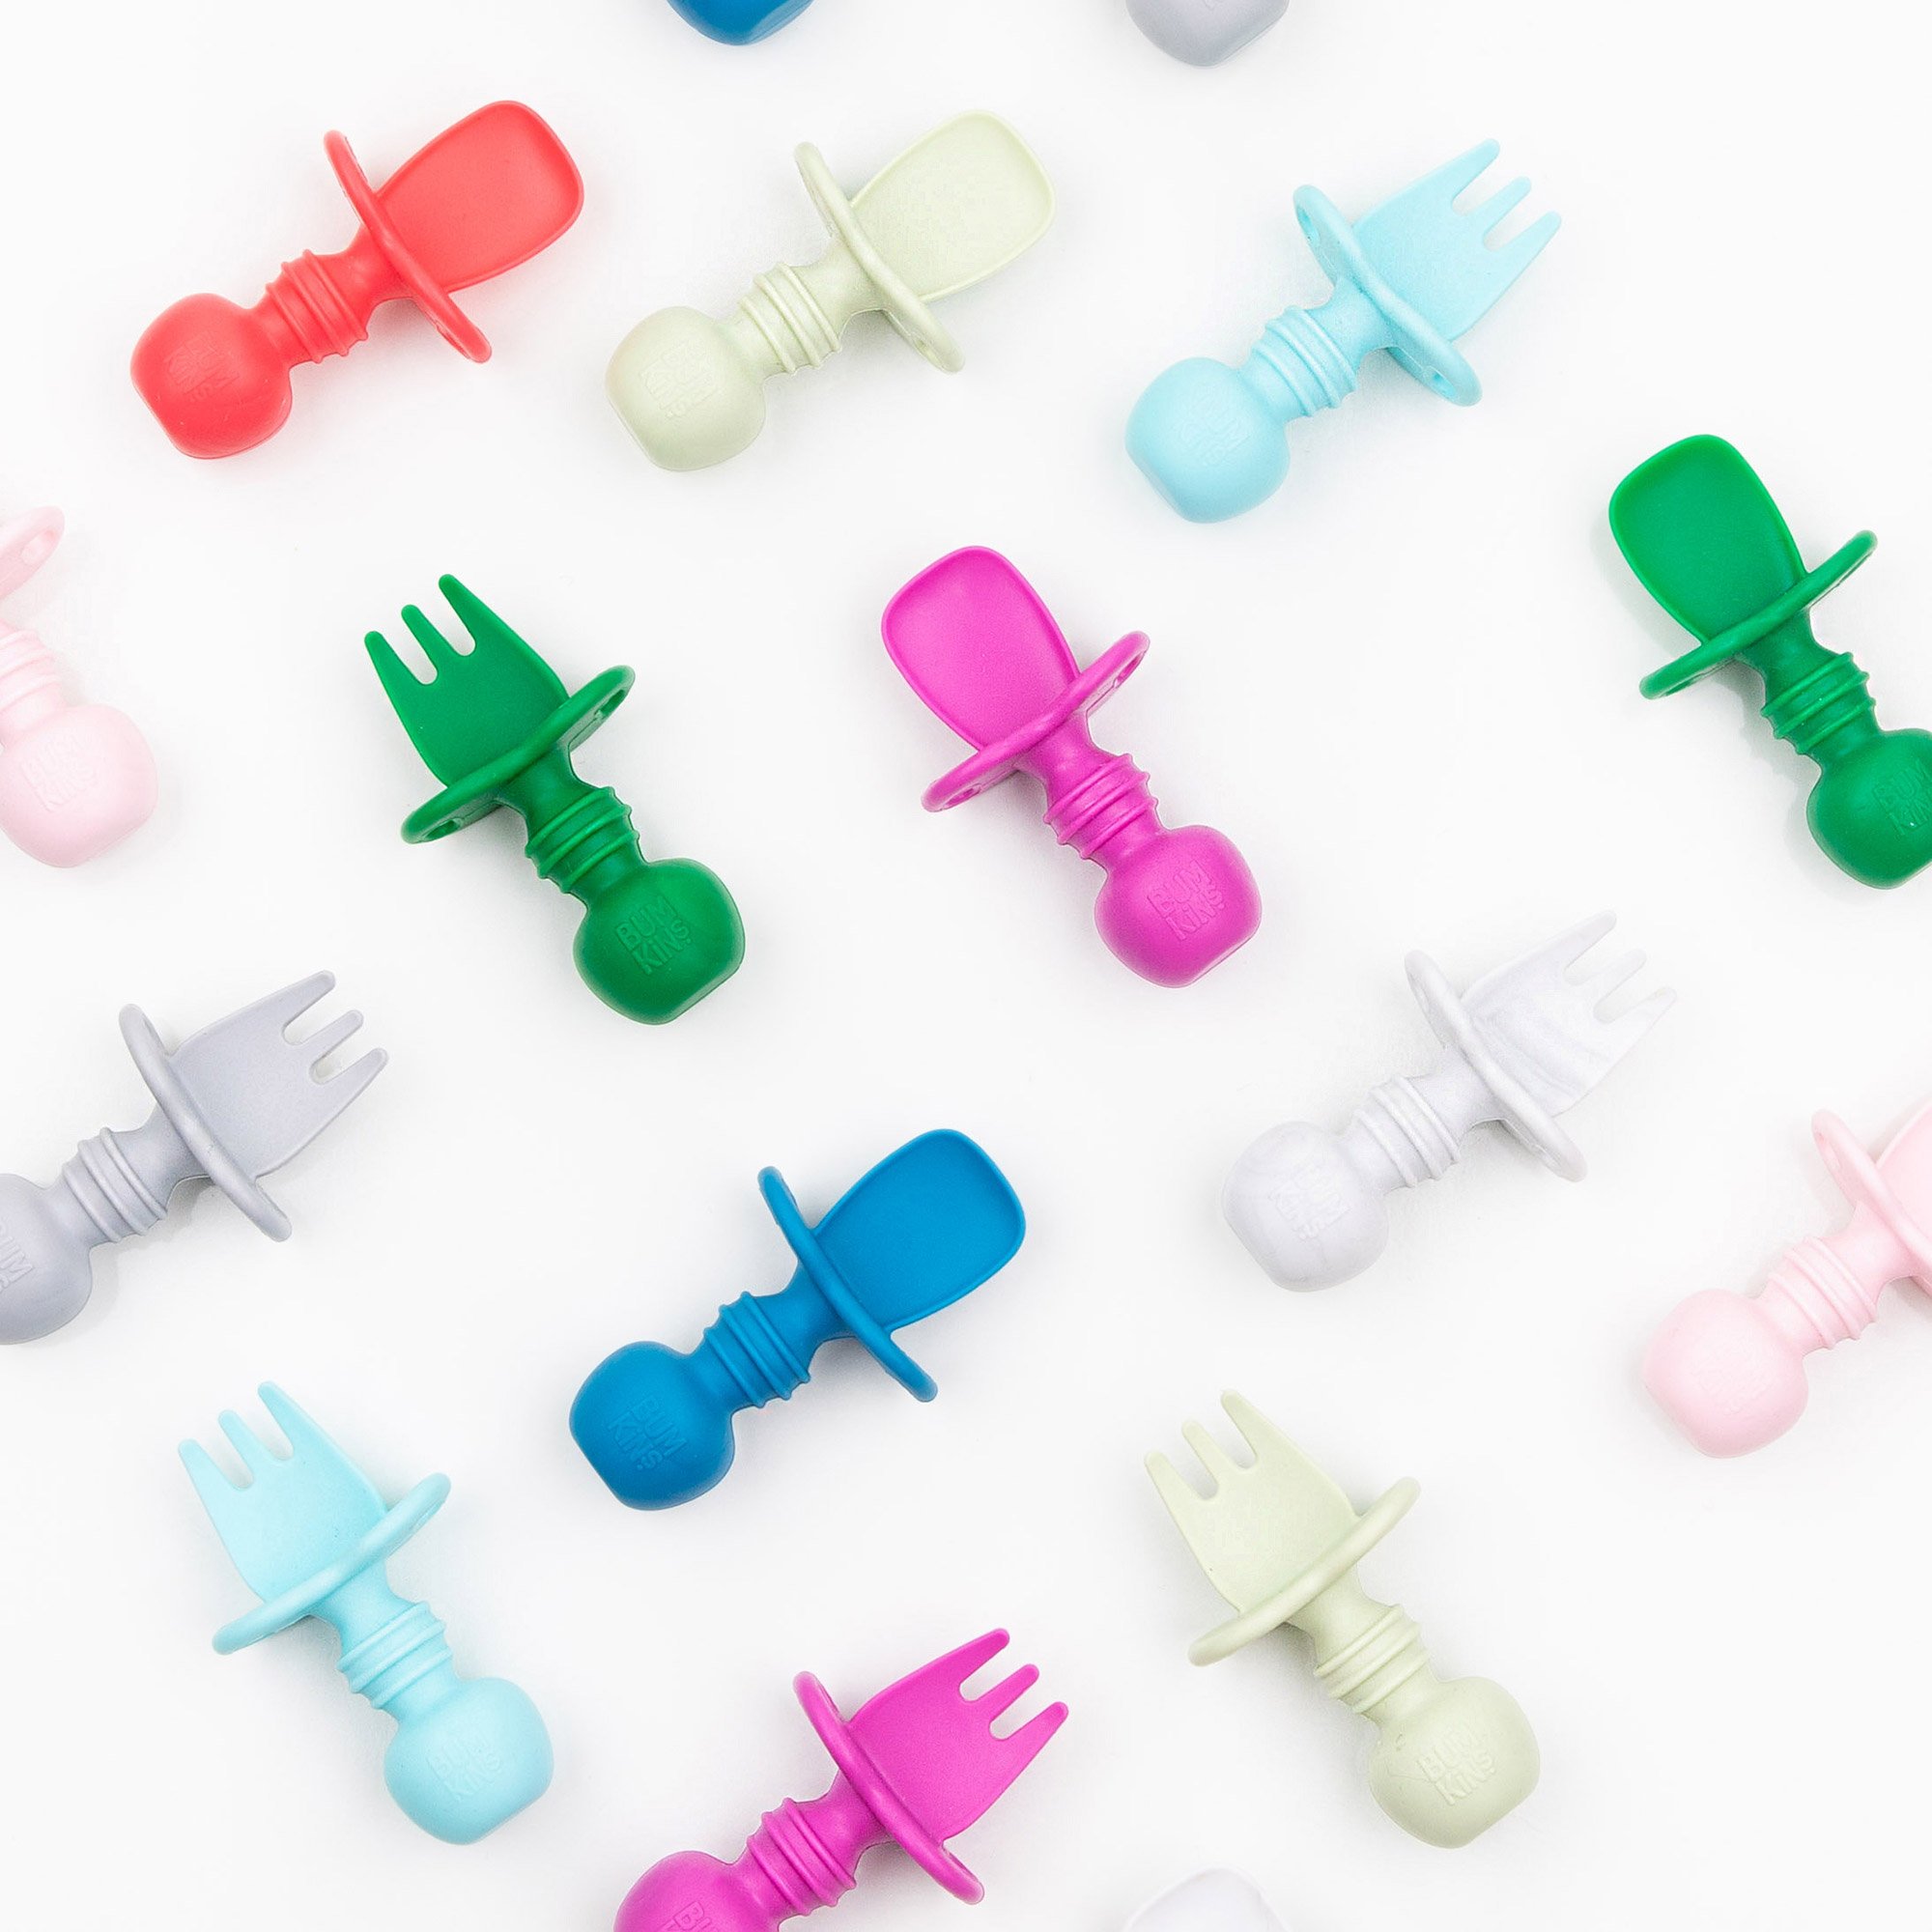
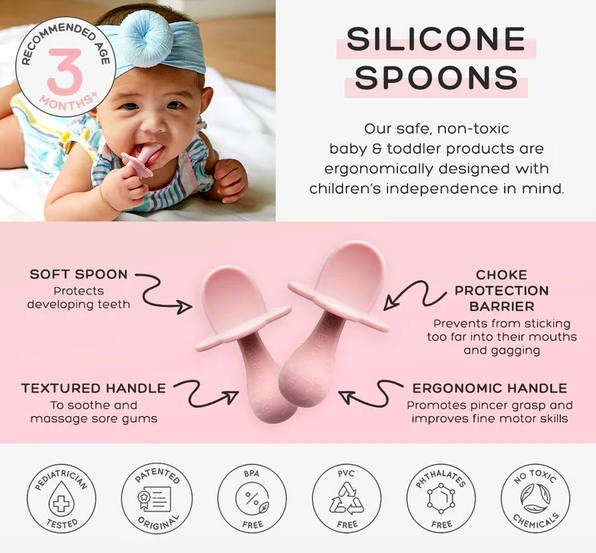
By 9 months of age, when kids aren’t comfortable with a spoon in their mouths, they may have missed out on this type of exploration.  Offer opportunities throughout the day (always when your child is safely seated) to mouth safe, flexible mouth toys. The grabease 2-in-1 self-feeding silicone spoon is a bit smaller than the grabease utensils, flexible & has a texture handle.  It’s a great first spoon for dipping & building confidence in a child who is hesitant.  

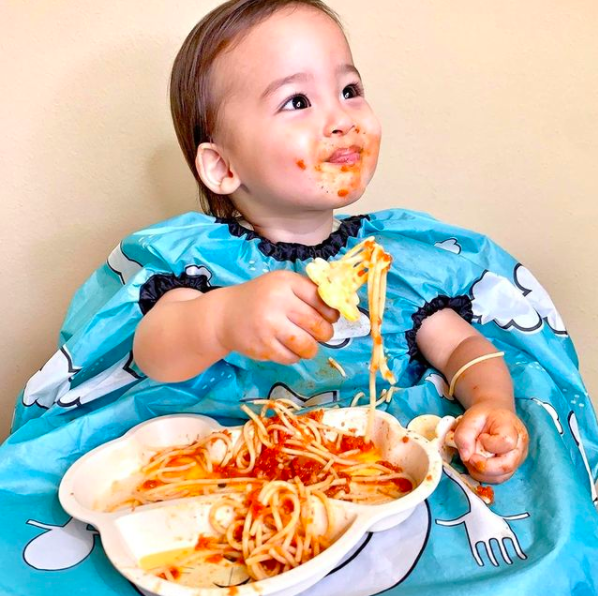
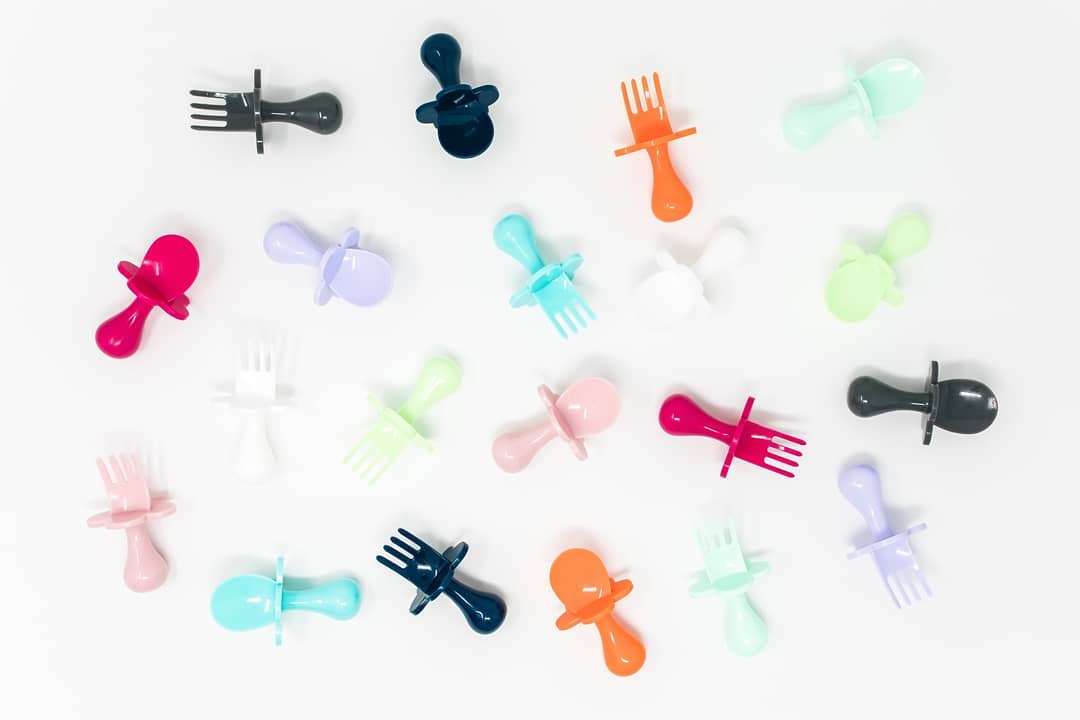
Got a toddler who isn’t keen on self-feeding with utensils? Offer the slightly larger grabease utensils during pretend play & let her lick & bite without the sensory component of food in her mouth. Keep offering the spoon at snack/mealtimes, too.  Give it a month & if your child is still hesitating, contact an occupational therapist or a speech language pathologist who specializes in feeding to offer specific strategies for your older child."
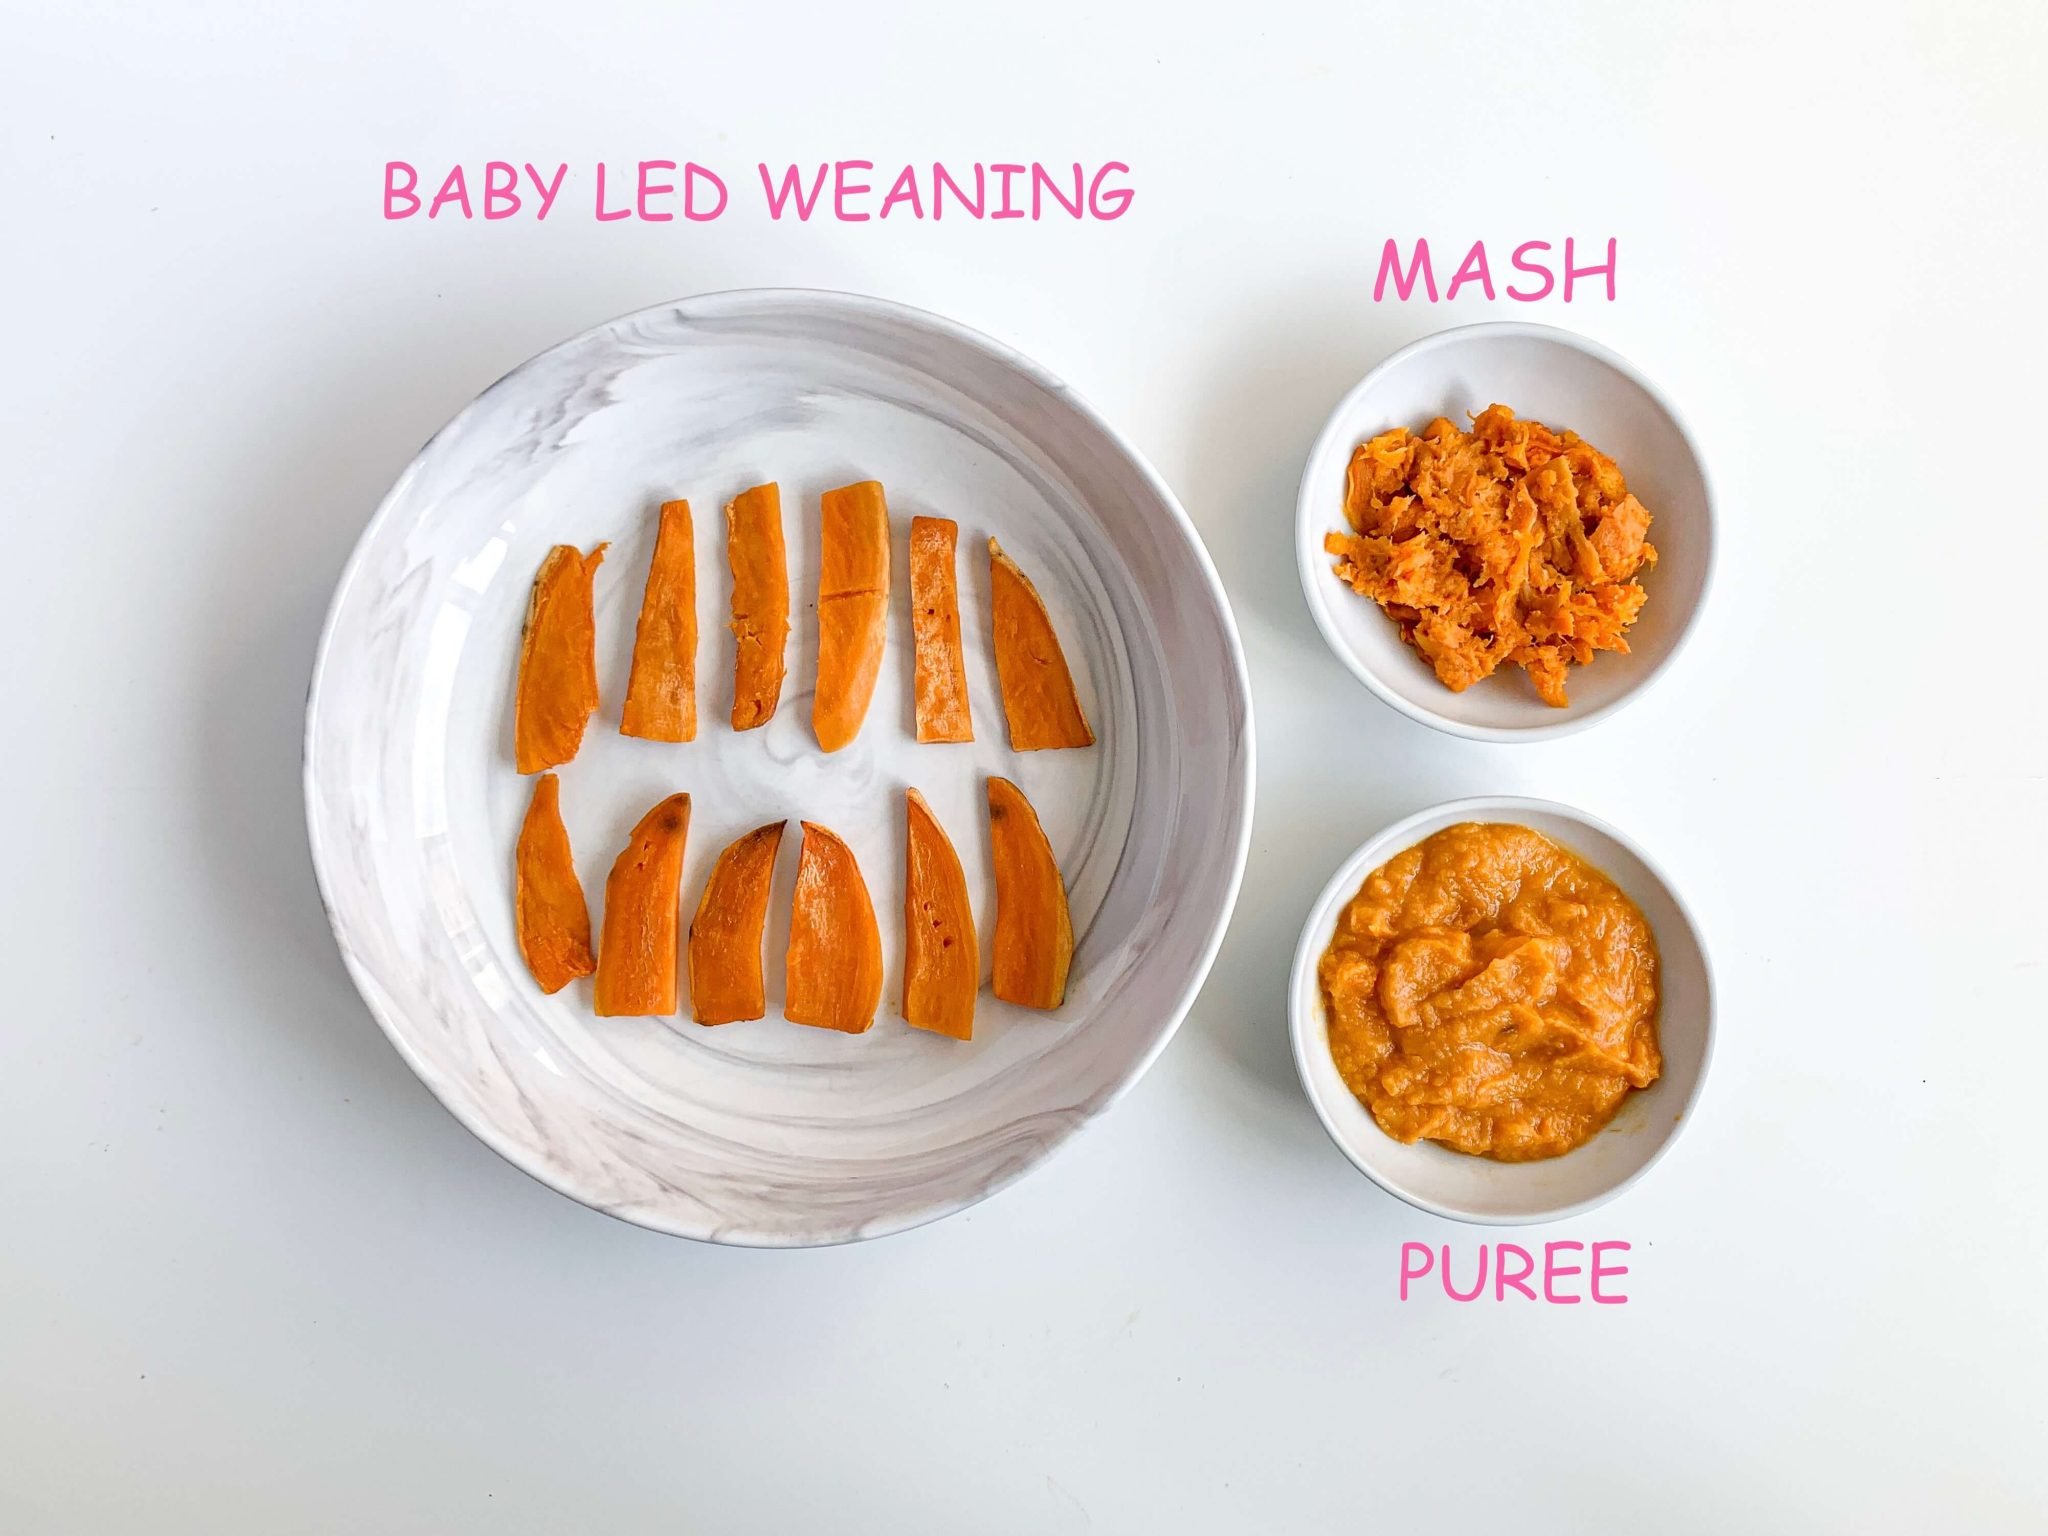
Mashed Sweet Potato

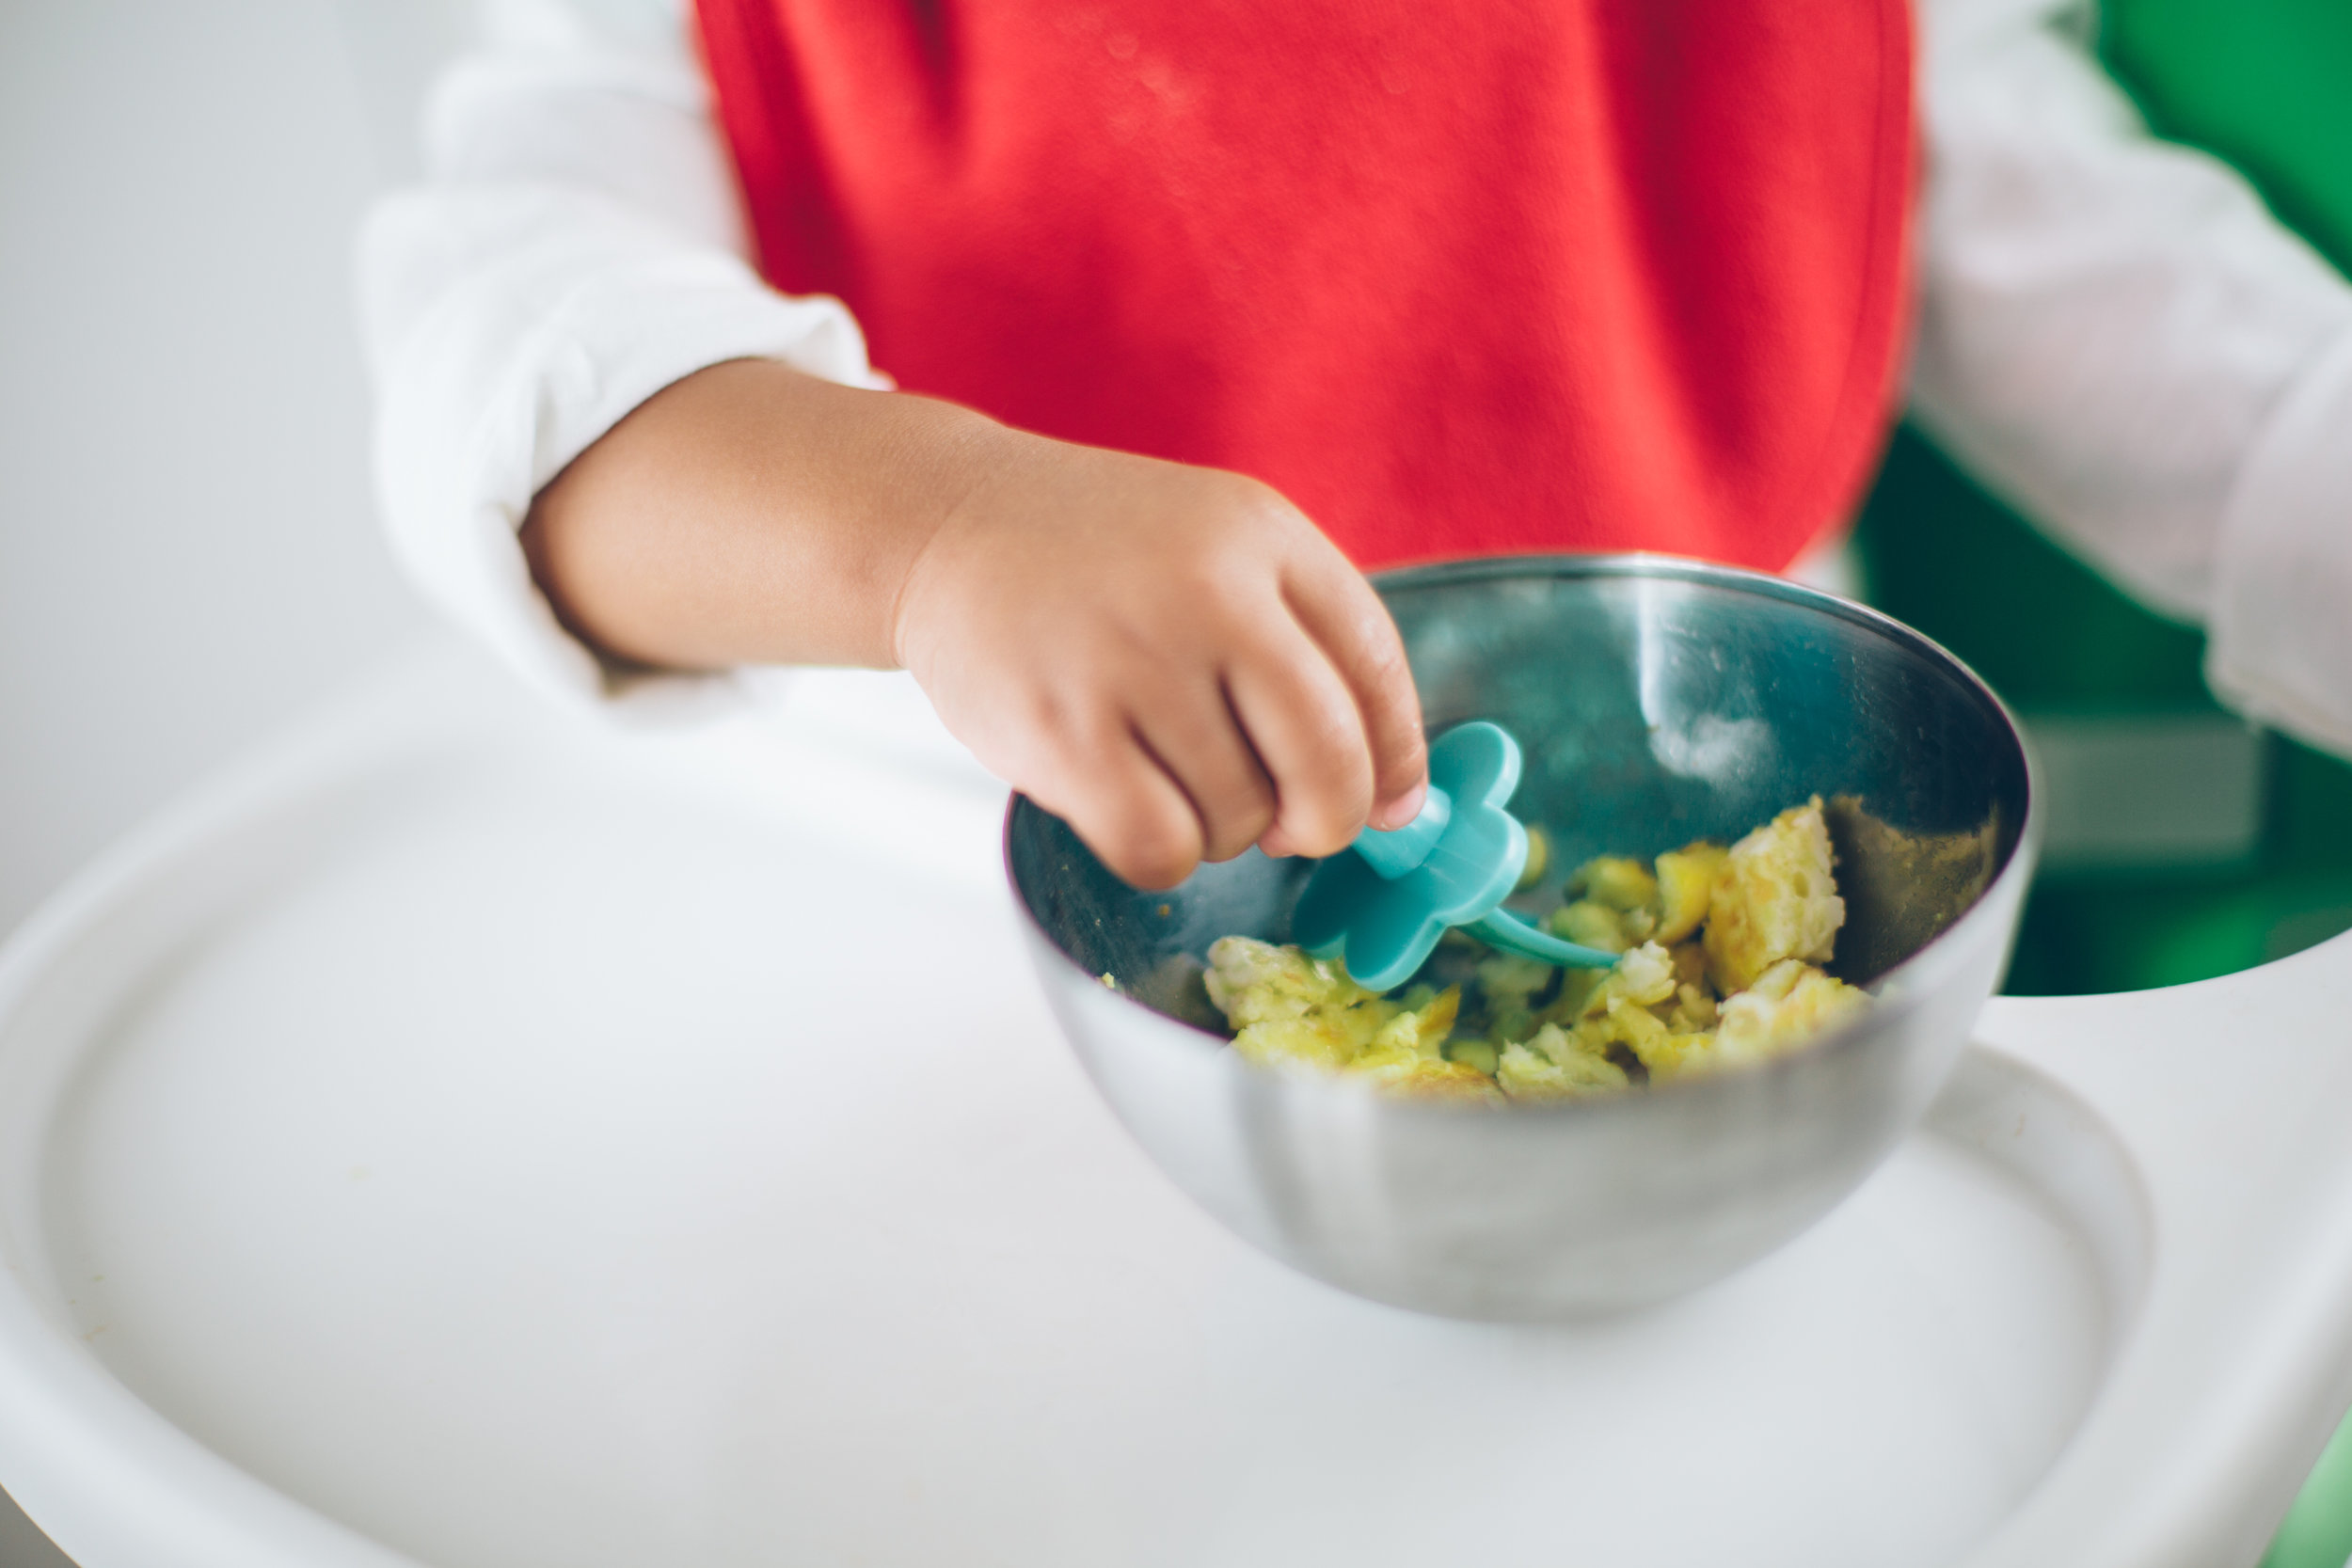
Sweet potato is a good start to introduce vegetables to your baby. Peel and roughly chop the sweet potato before boiling. Wait until tender, then transfer to a bowl to mash. Seasonings like salt, pepper, and garlic powder can be added for taste. Mashed food is a great way to teach your baby how to use a spoon. It doesn’t require much chewing either, since they have yet to develop teeth.

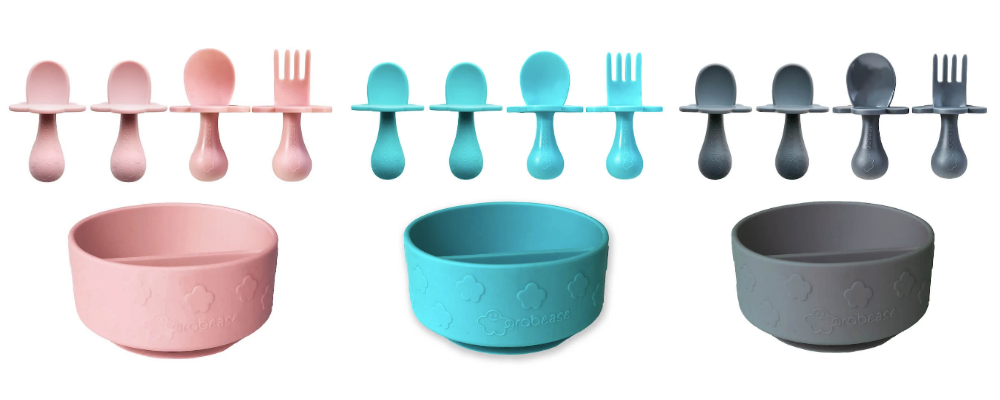
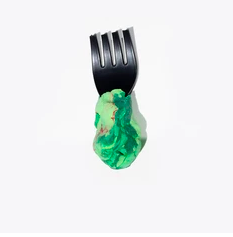
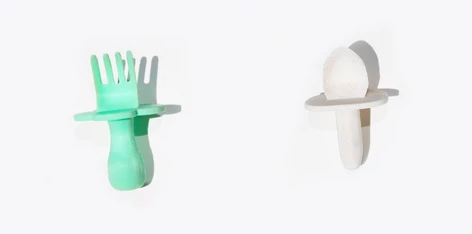
Ensure that the spoon your child is using is fit for their needs. Baby spoons allow for better grip and are made soft since their teeth are still growing. Choosing a brightly colored spoon can also entice your baby to eat on their own.

Grabease Silicone Spoons are patented, pediatrician tested and come in fun colors.
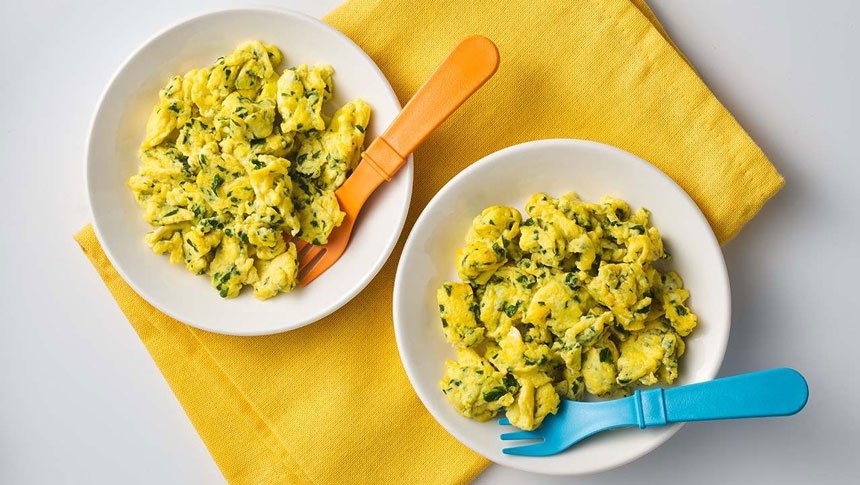
Scrambled Eggs

Eggs are a good source of protein and are customizable to your baby’s preference. You can cook the scrambled eggs with cheese to add flavor and a bit of texture. If you’re teaching your baby to use their hands to eat, cook the eggs using a folding technique instead of whisking. If needed, slice the eggs into bite-size pieces before serving. This way, the shape of the eggs will be easier for them to pick up.

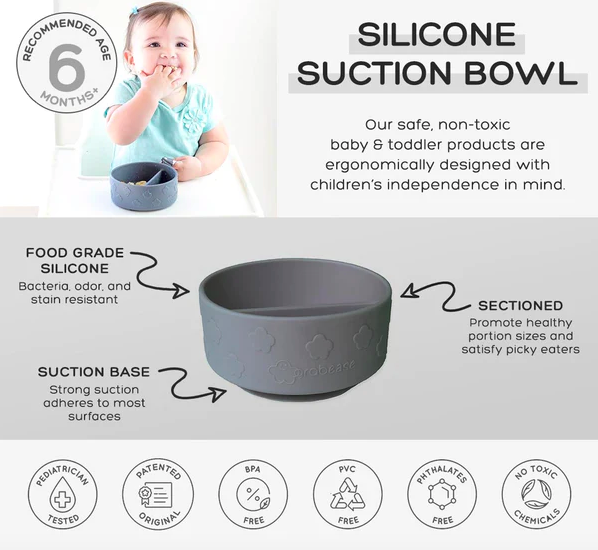
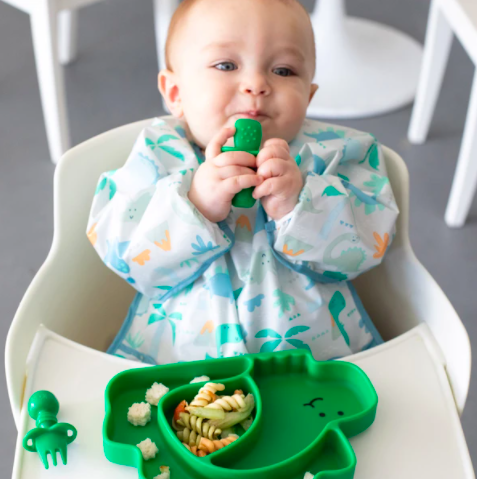
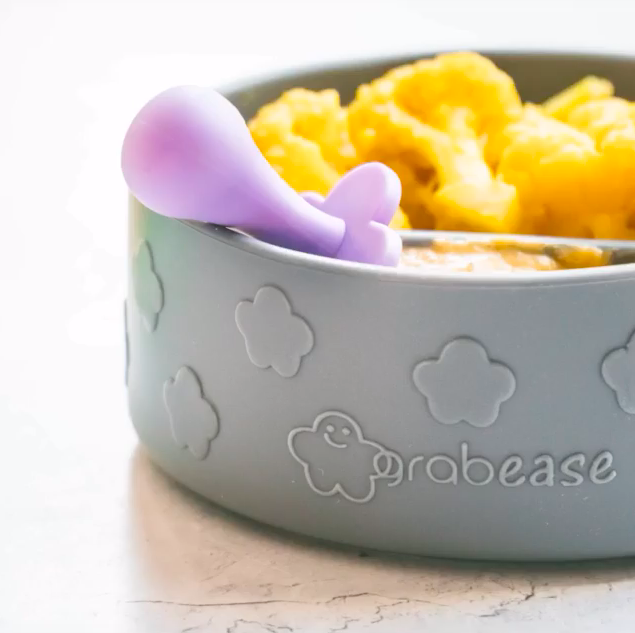
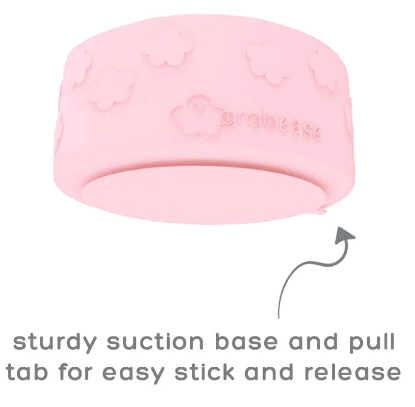
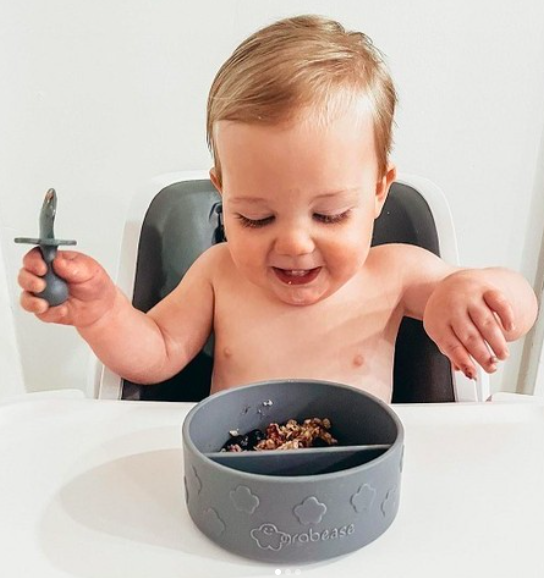
Since your baby is learning to self-feed, it is best to place their food in a baby-proof dish. Opting for baby bowls that have a suction prevents them from spilling their food. Additionally, choosing break-proof dinnerware is a safe option for their learning hands.

Grabease Silicone Suction Bowl is also patented and pediatrician tested. It is made of food grade silicone that is resistant to bacteria, odor, and stains. The strong suction adheres to most surfaces to make learning to self-feed easier for both parent and baby. It's also dishwasher safe!

Grabease 2021 new product: Big Kids Utensils Set and Cup Set

You must know Grabease - the first infamous ergonomic utensils brand. After launching toothbrush, all-over bibs, and silicone bowl last year, this year Grabease has launched utensils set for bigger kids and sippy & straw convertible cup set. In this article we will give you a quick introduction about these 2 new comers.


Spoutless sippy & straw convertible cup set

Includes clear cup, silicone sippy lid, straw, cleaning brush & mini open cup

cup_collection-hero_998b3773-0a0c-46fe-b0e5-cbf3d6210006_1440x.progressive.jpg

Grabease created a cup that offers 3 options of use, as we never know what will suit our little one best. Some do great with a straw, while others prefer sippy cups. Grabease cup set helps baby transition from one stage to another.

Grabease consulted with occupational therapists and feeding specialists to come up with the perfect cup with toddlers' perspectives in mind.

Screen Shot 2021-07-13 at 1.55.48 PM.png

Clear cup is designed to allow baby to see what they are drinking. When your little one is able to see the liquid in the cup, visual feedback helps them understand that the liquid is pouring into their mouth as they tilt their cup. The textured pattern enhances grasp sensory awareness, and when your little one is able to see the liquid in the cup, visual feedback helps them understand that the liquid is pouring into their mouth as they tilt their cup.

The food grade silicone lid and straw are resistant to all bacteria, odors, and stains. Use the included straw cleaning brush to thoroughly clean the straw after use.

Product basic information:

  • Available colors: Teal, Blush, Gray

  • Suitable for 6+ months

  • BPA-free, phthalate-free, lead and pvc-free

  • Dishwasher safe.

Screen Shot 2021-07-13 at 1.49.20 PM.png
 

Stainless steel fork, knife & spoon set

aka big kids utensils

As Grabease family grew larger, they were asked to develop the next stage of ergonomic utensils. Grabease 2.0 includes a thinner handle with grooved finger guides to encourage proper pencil-like grasp. The trio set includes a fork, spoon, and knife with a curved tip for safe self-use.

Grabease big kids utensils set is ergonomically designed to safely nurture independence in little ones ready to meet their next self-feeding developmental milestone. Using this set will also help strengthen their fingers while encouraging proper pencil grasp development. Recommended by occupational therapists and feeding specialists, Grabease utensils are the perfect learning tool for baby led weaning and beyond!

Product basic information:

  • Available colors: Teal, Blush, Gray

  • BPA-free, phthalate-free, lead and pvc-free

  • FDA-tested safe

  • Suitable for 18+months

  • Dishwasher safe.

Screen Shot 2021-07-13 at 1.48.30 PM.png

Baby bibs for BLW: Grabease all-over bib, Bumkins sleeved bib, or Tidy-tot bib?

Baby led weaning (BLW) could be so messy and frustrating, but BLW is totally worth the mess! So I choose to raise my baby with BLW method and I know I need to stocking up on a few great BLW bibs, it help me to feel so much happier while doing BLW. No constantly stress about the mess and instead I can enjoy eating with my daughter. I have 3 great bibs, Grabease, Bumkins, and Tidy-tot. I’ll let you know the pros and cons of each bibs.

My daughter always sat on her highchair during mealtime, so in this article, I will focus on the bibs that are designed for highchair user. Check out here for on-the-go bibs.

Contents:

| Why we need bibs when BLW

| Bumkins sleeved bibs pros and cons

| Grabeaase all over bibs pros and cons

| Tidy tot bibs pros and cons

| Conclusion


Why we need bibs when BLW

It is of course to minimize the mess. A good bib can catch food easily, some bibs offer full coverage over clothing including sleeves, others are made from soft muslin or high-tech neoprene and some are more rigid, made with pockets to collect any spills. Not all bibs are equal and it is important to look for fabrics that are comfortable, protective, durable and washable, along with a design suited to your child’s stage and that is easy to fasten.

I always look for a durable, easy to wash and the perfect size for protecting baby’s clothes but not getting in the way of self-feeding. I also love bibs with a handy pocket to catch falling food. With a fresh bib for each meal, I can recycle food that’s fallen into the pocket back on to baby’s plate or bowl, also helping to minimize food waste.

Read also: 3 Rules you must follow when giving first food to your children

But if you are one of those moms whose always let your child naked, then you might not need the bibs so much, haha.

Baby bibs for BLW-7

Bumkins sleeved bibs pros and cons

The good:

  • Lightweight but durable long-sleeved bibs featuring a catcher pocket.

  • Bumkins sleeved bibs protect almost every inch of my daughter’s clothes from spills

  • They machine wash

  • Free from BPA, PVC, phthalates and lead

  • I love the tie back, not only it gives plenty of room to grow, my daughter keep pulling off the bibs that have velcro

  • Wrists have little cuffs so nothing can get up the sleeves

The not so good:

  • One small criticism from me was that the bibs could get stained with time

  • If I went to a restaurant without air conditioner, my daughter will be pretty cranky due to the long sleeves and she feel hot.. I recommend it for at-home-usage

Where to buy Bumkins sleeved bibs.

Baby bibs for BLW-6

Grabease all-over bibs pros and cons

The good:

  • Large size covers my daughter and it perfectly pairs with my high chair

  • Lightweight - roll up the bib for easy storage or to bring it on-the-go!

  • Washable - Because who has time to hand wash? Both machine and hand wash, remember to hang dry completely before storing

  • Safe! It BPA-free, PVC-free, vinyl-free, phthalate-free and lead-free

  • 100% polyester with TPU coating for waterproofing - it really keeps my baby dry from drool and spills

  • I am impressed with Grabease all over bibs waterproof effectiveness

  • I love its colors, especially the blush one!

  • Grabease all-over bib has a short sleeves, but this what makes me even love it more, I live in Asia where the weather is quite hot here, my daughter couldn’t stand the heat if she wears a long sleeves bib

  • You can even use it as cover while making your own baby’s hairstyle

Read also: Best baby self feeding spoon and fork set

The not so good:

  • You need to have either booster chair or high chair to use it, some restaurant don’t have neither of them, so need to use more on-the-go bibs

  • I am not a big fan of their stretchy neck and arm holes, my daughter doesn’t really enjoy it

  • The price is very high comparing with other bibs’ brand

Where to buy Grabease bibs.

Baby bibs for BLW
Baby bibs for BLW-4

Tidy tot bibs pros and cons

I let my daughter use the iconic bib and tray kit

The good:

  • The tray can be used for weaning and messy play, keeps food and toys off the floor

  • Is hygienically clean – provides an antibacterial, food-safe, BPA and Phthalate free surface for your baby to eat from, wherever you are

  • The tray is easy to assemble, folds away for easy storage

  • Comes with a storage bag

The not so good:

  • I rarely use Tidy tots iconic bibs, in my point of view this bibs is not that convenient, it contains bibs and the tray, which I need to clean 2 separate items.

  • It is hard to find a big space to dry out the tray, since it is pretty big.

  • My daughter feels left out when she use Tidy tot, because the tray is so big, although she usually sit in her highchair, but Tidy tot’s tray is so big, feels distance, haha, what a dramatic daughter.

  • She lover drawing, but the tray is not steady enough for drawing purpose.

Where to buy Tidy Tot bib and tray.

Baby bibs for BLW-9

Conclusion

Over all, if for home use, I like Grabease better than Bumkins. The Grabease bibs can protect my daughter from the mess better and catch the food better. Maybe some of you will concern about the Grabease bibs short sleeves, but this is the feature I like about. I am living in Asia, most of the time is hot here, I’ll let my daughter wear sleeveless clothes, so the short sleeve is not a problem for me. What I like most about Bumkins is the tie back feature. But both of them is not really for on-the-go, you will need to prepare one more bibs meal time outside home. Check out here for on-the-go bibs.

If you are interested in starting your own baby product business, we are welcoming you to be our distributors. Be part of BabyLux family, if you want to be baby products distributors but not sure where to start, drop us a message!

4 Reason why I love Grabease silicone suction bowl

Silicone products are becoming increasingly popular and can be found in almost every kitchen, bathroom or nursery. Grabease stay-put bowl provides peace of mind to let littles explore self-feeding without the worry of them making a mess.

We love these Grabease silicone suction bowl since they are easy to clean, even with foods like tomato sauce that can stain other plastic plates. They’re also a safer material for heating in the microwave and washing in the dishwasher. They are very resistant to scratches and have been very durable in our experience, because scratches can break down the material.

Grabease-bundle

Grabease silicone suction bowl come in 3 colors, Blush, Teal, and Gray. Bundle with the stage 1 spoons (spoon teether) which is gentle on teething gums, and stage 2 fork & spoon set for more food exploration. The bundle is the perfect companion for the whole BLW journey.

Read more: Grabease, best baby self feeding spoon and fork set

Grabease-1
Grabease-5
 

What I love about Grabease silicone bowl?

Portion, don’t separate

Sectioned to promote healthy portion sizes & satisfy picky eaters. Use sections as a way to portion, rather than separate, foods! The last thing we want is a child who's used to their foods not touching each other and falling apart when the rice touches the chicken or (god forbid!) the ketchup.

Read more: Tired of preparing a separate meal for your picky eater?

Grabease-4

The suction is sturdy

This bowl knows how to stay-put with its sturdy suction feature. Be sure to adhere the bowl firmly to the table and allow yourself to go enjoy a cup of coffee without worrying it might end up on the floor. Deep sides for easy scooping. Strong suction base that will adhere to most surfaces.

For a perfect and sturdy suction, press the base of the suction bowl down (where the divider is located). For release, simply lift and pull the tab sticking out at the base of the suction bowl.

Read more: The importance to let your baby self-feeding, it's worth the mess

Grabease-3

Keep bacteria away

Food grade silicone can be a safe and convenient alternative to plastic. Due to its flexibility, light weight, easy cleaning and hygienic and hypoallergenic properties (it has no open pores to harbor bacteria), it is especially convenient for snack containers, bibs, mats, protective sleeves and bath toys.

More than ever Grabease are doing are best of ward of harmful bacterias, and this bowl is ready to join the fight. Made of bacteria resistant, food grade silicone. Our food grade silicone is resistant to most bacterias, odors, and stains.

Grabease-2

Can be both boiled sterilized

Be sure to wash and inspect bowl for any breakage before use. Discard at first sign of weakness or damage. Our food grade silicone bowl is dishwasher safe. It can be both boiled and sterilized.


Grabease suction divided bowls are designed to provide parents with a compact option optimized for young eaters - the perfect companion for you baby led weaning journey- without the worry about this bowl flying off the table onto the floor. Pairs perfectly with Grabease other items, like the ergonomic utensils.

I love how Grabease develop their product, they developing meaningful products. When I think about eating, I always have Grabease in my mind. They have develop a full kits to build an independent eater.

Read more: Grabease all-over bib review

Grabease full range of product.

Grabease full range of product.

Find a perfect Grabease bundle via your local distributor, or drop us a message if you can’t find one. They are available in Thailand, Singapore, Malaysia, Korea, Taiwan and many other countries. Also welcoming you to be part of BabyLux family, planning to start own business by being baby products distributors but not sure where to start, drop us a message!

The Best Bibs for Baby-Led Weaning: A Buyer's Guide for Messy Eaters

Editor's Note:

This article was originally a review of a specific bib we once carried. We've updated it to be a comprehensive guide on the features that make a full-coverage bib a must-have for messy eaters. The insights are based on real-world experience to help you choose the best option for your family.


Baby-Led Weaning (BLW) is an amazing way to introduce solid foods. It has so many positive benefits for a child's development. However, there's no denying the biggest con: it can be incredibly messy and frustrating to clean up after every meal.

A great bib (and floor mat!) can be a game-changer. It will help you feel so much happier and more relaxed during your baby's BLW journey. When you aren't constantly stressing about the mess, you can truly enjoy the experience of eating with your baby.

For maximum protection, a full-coverage, all-over bib is the best solution. Here is what you should look for when choosing one.

The Ultimate Checklist for a Full-Coverage Bib

The Good: Key Features to Look For

  • Generous Size and Coverage: Look for an oversized bib that covers not just your baby's chest, but their lap as well. The best designs have an elastic hem that can be stretched around the high chair tray, creating a "catch-all" zone that contains all the mess.

  • Lightweight and Portable: The fabric should be lightweight and easy to roll up for storage in a diaper bag, making it perfect for meals on the go.

  • Easy to Clean: This is non-negotiable. The bib must be machine washable for deep cleans and have a smooth surface that is easy to wipe down for quick clean-ups between meals. Always ensure you hang it to dry completely before storing.

  • Safe and Waterproof Materials: Safety is paramount. Ensure the bib is certified BPA-free, PVC-free, and phthalate-free. Look for a 100% polyester fabric with a TPU coating for waterproofing. This will keep your baby's clothes completely dry from drool and spills.

  • Comfortable Design: Look for stretchy neck and arm holes that are comfortable for your baby. Consider the sleeve length based on your climate; short sleeves are fantastic for warmer weather to prevent overheating, while long sleeves offer maximum coverage for especially messy meals.

  • Versatility: A great bib can often double as a smock for messy art and craft projects!

The Final Verdict

For parents embracing the fun (and chaos) of Baby-Led Weaning, a full-coverage bib isn't a luxury—it's an essential tool. It dramatically reduces laundry, minimizes clean-up time, and lowers the stress level of mealtimes. By investing in a high-quality bib with these features, you're not just buying a piece of fabric; you're buying yourself more joy and peace of mind during one of your baby's most important developmental stages.

Screen Shot 2019-10-16 at 11.58.09 AM.png
Screen Shot 2019-10-16 at 11.58.20 AM.png
Screen Shot 2019-10-16 at 11.59.25 AM.png

The Story of a Safer Baby Spoon: A Product's Origin Story

Editor's Note:

Please note that we no longer distribute the Grabease brand. We have kept this article live because we believe it tells a powerful and important origin story about product innovation in the baby space.

The principles discussed here, such as the revolutionary short handle and the choke-protection shield, are valuable design features that have changed the market. We see this article as a case study in how a simple, parent-driven idea can lead to a safer and more effective product for all children.


The history of Grabease

And please respect every brand’s effort and creativity.

From lawyer to product developer, Maya Shalev - founder of Grabease - loved problem-solving but didn't love the aggressiveness of litigation. She did mediation training at the Los Angeles Attorney's office before getting pregnant with her daughter, Alma.

As a stay at home mom for a few years, Maya was able to apply her problem-solving skills when she developed, with her dad, products that were missing in the market.  

In 2014, Maya found herself at a crossroads when her father passed away while she was three months pregnant. Finding herself in this new situation, Maya decided to take a break to cope with the loss of her father and focus her energy on the new life she was bringing into the world.

In 2015, Maya found herself with a new challenge when her six-month-old son, Amit, was learning how to self-feed. This obstacle reignited her passion for developing a product that would not only solve the need for her son but other moms going through similar scenarios.

Off the bat, she noticed that baby utensils aren't designed with babies in mind. The handles were too long and her son couldn't hold the utensil naturally. She decided to meltdown cheap forks to create a shorter, thicker handle. The first mold was created out of Playdough, a common medium in a house with kids.

The next phase was to create a set of utensils, the most expensive pair of fork and spoon she's ever invested in, a whopping $400 for a 3D printed set! Using her son as a guinea pig to test out the new utensils Maya noticed that the handle was on the thin side so she went back to the drawing board and designed a teardrop-shaped handle.

Screen Shot 2019-10-05 at 8.57.47 AM.png

She took this prototype to a Pediatric Occupational Therapist for some feedback to make sure she was developing the right product. The feedback was overwhelmingly positive. The Occupational Therapist told Maya that the Grabease utensils "makes a great developmental product for children ages 4 months and up. Grabease supports fine motor skill development and independent feeding skills."

The inspiration to go back in business to not only create but give back was through the social initiative she saw the Toms brand spearhead. When Grabease was being packed and shipped Maya partnered with The Harvest Home, a non-profit organization that helps homeless pregnant women get back on their feet.

The Grabease design was immediately patented in 2016 and sent to production. A soft launch was introduced via Amazon to see if there was a need for the product. Maya designed the product with the intention that nine-month-old children and older would be using the product but to her surprise moms were excited to share photos and videos of their six-month-old babies self-feeding with the Grabease.

Screen Shot 2019-10-05 at 8.58.19 AM.png

Grabease was tagged by tons of moms on social media, gushing with excitement that their kids were independently eating with the utensils.

The pivotal change for the brand was at the JPMA trade show. The last day of the show is open to consumers, the excitement and the crowd around the Grabease booth was proof that the brand was going to be high in demand. Shortly after, all products were sold out on Amazon as well. Before long, the Grabease website launched!

Not only was Grabease helping babies learn how to independently feed themselves, it was helpful for differently-abled children as well. Parents were sharing how Grabease utensils were helping their children with cerebral palsy or down syndrome. This was heartwarming and impactful for Maya.

Different organizations that helped children with different abilities were now reaching out to the brand for support. Without hesitation, Grabease donated products to help and promote the development of independent eaters. With the word spreading, Maya found herself getting emails and calls from Occupational Therapists that were interested in trying out the product in their clinics and then endorsing the product. Another win for Grabease!

In quarter 1 of 2017 Maya graduated from the kitchen to the garage. Soon after, Nordstroms and other independent retailed picked up the brand and Grabease moved into an office space in 2018.  

Grabease is now available in 300 stores and internationally, accessible in over 15 countries and expanding rapidly!

Maya didn't stop there. The Grabease toothbrush was the next product created. Thought of and designed by Maya's then 8-year-old daughter, Alma. The idea came to her when she saw the struggles her parents were having when trying to brush her little brothers' teeth, Amit. 

Alma sketched the design and 2 years later the design came to life. The toothbrush was a hit. So much so that most kids don’t want to put it down!

Maya and the team of moms take pride in developing products that provide solutions for families around the world while helping children in need. Grabease is excited to continue launching innovative and helpful products for other parents because being a parent is a lot of work and we want to alleviate unnecessary stress so you can enjoy the best moments with your growing tot!

Screen Shot 2019-10-05 at 8.56.52 AM.png

Article quoted from Grabease blog post.

Easy & Healthy Baby 'Ice Cream': A 2-Ingredient Recipe for Teething Relief

Editor's Note:

This article was inspired by a clever hack using a specific brand of utensils we once carried. We loved the idea so much that we've updated it to be a general guide. Now, you can use this fun and healthy recipe with any appropriate baby-safe, ergonomic utensil you own!


On a hot summer day or when your baby is struggling with teething pain, there's nothing you want more than to give them a soothing, cool treat. But traditional ice cream and popsicles are loaded with sugar and other ingredients not suitable for a little one.

What if you could make a delicious, healthy, and completely sugar-free "ice cream" using just two simple ingredients you already have at home? And what if the "popsicle stick" was a safe, perfectly-sized tool your baby already loves?

Get ready for your new favorite baby hack.

The Secret: Your Baby's Own Utensil!

The genius of this recipe isn't just the food—it's the tool you use. Traditional popsicle sticks are too thin and long for a baby to hold safely. The solution? Use your baby's own self-feeding spoon!

The best utensils for this are the ones with a short, wide, ergonomic handle and a choke-protection shield. This design makes the perfect, easy-to-grip handle that is completely safe for your baby to hold and chew on.

The Easiest 2-Ingredient Baby "Ice Cream"

This recipe is simple, healthy, and takes just minutes to prepare.

What You'll Need:

  • Ingredients:

    • 1 ripe banana

    • 2-3 tablespoons of breastmilk, formula, or plain, unsweetened whole-milk yogurt.

  • Optional Add-ins:

    • A few blueberries or a strawberry for extra flavor and color.

    • A spoonful of mashed avocado for healthy fats.

    • A tiny pinch of cinnamon.

  • Tools:

    • A blender

    • An ice cube tray or small food-safe container

    • Your baby's ergonomic self-feeding spoon

Step-by-Step Instructions:

  1. Blend: Combine the banana and your liquid (breastmilk, formula, or yogurt) in a blender. Blend until completely smooth.

  2. Pour: Pour the mixture into the sections of your ice cube tray or into a small container. Fill them about halfway to three-quarters full.

  3. Insert the Handle: Place your baby's spoon, handle-up, into the center of each purée-filled section.

  4. Freeze: Place the tray in the freezer for at least 2-3 hours, or until completely solid.

  5. Serve and Soothe: To release, run the bottom of the ice cube tray under warm water for a few seconds. Pop one out and hand the utensil handle to your baby for a healthy, soothing, and delicious treat!

Why This Hack is So Great for Babies

  • Soothes Sore Gums: The cold temperature provides immediate relief for teething pain.

  • 100% Healthy and Safe: You have complete control over the ingredients. There's no added sugar, preservatives, or artificial flavors.

  • Develops Motor Skills: Holding the chunky utensil handle helps your baby practice their grasp and hand-eye coordination.

  • Reduces Waste: There are no disposable popsicle sticks to throw away!

This simple recipe is a fun, healthy, and practical way to offer your baby relief and a yummy treat, all in one.

Ready to Make Your Own Healthy Baby Pops?

Having the right tools is the first step. A good ergonomic spoon is not just for meals—it's a tool for fun and soothing, too!

Screen Shot 2019-09-23 at 3.14.46 PM.png

How to Choose Baby's First Spoon: A Guide to Self-Feeding Utensils

Editor's Note:

This article was originally a comparison between two specific brands. To provide more timeless and valuable advice, it has been updated to be a general guide on the two primary types of starter utensils for babies. This will help you understand the features to look for as you choose the best tools for your little one.


When your baby enters the age of 6 months, it's an exciting time to introduce them to the world of solid foods. This is when a baby's first spoon and fork come into play. Unlike the utensils we use, a baby's first tools must be specially adjusted for their little mouths, ensuring they are safe, comfortable, and easy to use.

The market is full of options, but they generally fall into two distinct categories, each designed for a different phase of the self-feeding journey. Understanding the difference is key to preventing frustration and setting your baby up for success.

Type 1: The Starter "Chewtensil" for Early Exploration

This type of utensil is perfect for the very beginning of the solid food journey, often suitable for babies as young as 4-6 months. It acts as a bridge between a teether and a true utensil.

Key Features:

  • Soft, Flexible Material: Usually made from 100% food-grade silicone, it's gentle on a baby's sensitive gums.

  • Dual-Sided with Textures: The "spoon" end is often textured and designed more for dipping into purées than for actual scooping. The handle is also textured, making it double as an effective teether.

  • Easy-to-Grip Handle: The handle is typically short and wide, making it easy for a baby's developing grasp.

Pros:

  • Excellent for developing hand-to-mouth coordination.

  • Doubles as a teether, providing soothing relief during mealtimes.

  • Very safe for babies to explore independently.

Cons:

  • Not effective for scooping thicker foods or piercing solids.

  • Babies will outgrow its limited functionality as their skills improve.

Type 2: The Ergonomic Self-Feeding Utensil

This is the next step up, designed for when your baby (typically 6-9 months and older) is ready to start scooping and piercing food themselves.

Key Features:

  • Firmer Material & Real Utensil Head: While the handle might be silicone, the head is a real (but baby-safe) spoon and fork, allowing for actual scooping of things like yogurt and piercing of soft fruits.

  • Short, Ergonomic Handle: The defining feature is a short, fat handle that encourages a baby's natural vertical grasp, making the motion to their mouth more intuitive.

  • Choke-Protection Shield: This is a critical safety feature. A wide "cloud" or flower-shaped guard below the utensil head prevents a baby from gagging themselves.

Pros:

  • Promotes true self-feeding independence and fine motor skills.

  • The choke shield provides invaluable peace of mind for parents.

  • Effectively prepares a child for using standard toddler utensils.

Cons:

  • The firmer material is not designed for teething.

  • Requires slightly more coordination than a simple "chewtensil."

Summary: Which One Is Right for Your Baby?

It's not a question of which one is "better," but which one is right for your baby's current stage.

  • Think of the "Chewtensil" as Stage 1: Perfect for the initial introduction to solids, for dipping, and for teething relief.

  • Think of the Ergonomic Utensil as Stage 2: The ideal tool once your baby shows a real desire to scoop and feed themselves independently.

Many parents find it helpful to own both, starting with the soft chewtensil and "graduating" to the ergonomic self-feeder as their baby's confidence and skills grow.

Maya Product Photo Shoot-206.jpg

A Parent's Guide to Choosing the Best Baby Spoons and Forks

Editor's Note:

This article was originally a "best of" list from 2021. To provide more timeless and valuable advice, it has been updated to be a comprehensive guide on the features to look for when choosing the perfect spoon and fork for your baby's developmental stage.


When your baby starts eating solid foods, their growth requires a new level of attention and equipment. The right bowls, plates, spoons, and forks are essential accessories to make mealtime successful. You will get a lot of use out of these tools, so it's wise to choose well. With so many baby spoons and forks on the market, it can be confusing to know which one is best. This guide will help you choose.

How to Pick the Perfect Baby Spoon and Fork: A 3-Point Checklist

1. Who Will Be Feeding the Baby?

The first question to ask is who will be holding the utensil. The answer determines the type of spoon you need.

  • Parent-Feeding Spoons: These typically have a longer handle, designed for an adult's hand to comfortably reach the baby's mouth from a distance.

  • Self-Feeding Spoons: When your child wants to eat independently, it's time to switch. These spoons have shorter, chunkier, ergonomic handles shaped for a baby's natural grasp. They are specifically designed to help develop fine motor skills.

2. What Is It Made Of?

This is the most important feature. A baby's gums are delicate, and they aren't coordinated enough to use metal utensils safely.

  • The Best Choice: Silicone. 100% food-grade silicone is the ideal material. It's soft, hygienic, durable, and free from harmful chemicals like BPA and phthalates.

  • Other Good Options: Soft plastics and smooth, splinter-free wood are also safe alternatives.

  • What to Avoid: Metal spoons are too hard and can hurt a baby's gums and developing teeth.

3. Is It the Right Size?

Baby utensils should be much smaller than yours. A spoon might look tiny to you, but it's probably the perfect size for your little one's small mouth. The spoon bowl should not be too deep, making it easy for your baby to get the food off.

Key Features to Look for in Modern Baby Utensils

Beyond the basics, today's most innovative utensils have special features designed for safety and success.

  • The Choke-Protection Shield: This is a revolutionary safety feature. It's a wide barrier located on the handle that prevents your baby from pushing the spoon or fork too far into their mouth and gagging. It provides invaluable peace of mind for parents.

  • The Silicone Spoon-Teether: Perfect for the earliest stages, these spoons are made entirely of soft, chewable silicone. They act as a "2-in-1," allowing a baby to get used to the motion of self-feeding while also soothing their sore gums.

  • The Food-Gripping Starter Spoon: Before a baby masters scooping, they start by dipping. Some starter spoons are flat with textured surfaces designed to grip onto purées, allowing your baby to successfully get food to their mouth without needing to scoop perfectly.

  • Hygienic and Travel-Friendly Designs: Look for sets that come with a clean carrying pouch. Some innovative designs even have a base that allows the spoon to stand up, keeping the tip off a dirty restaurant table.

A Final Word of Advice

Baby utensils are usable for years to come, so it's a good idea to invest in a nice set for home and perhaps some less expensive ones for the diaper bag, as it's easy to lose them when you're out. Having a few sets is always wise.

Ready to Start the Self-Feeding Adventure?

The right utensils can turn mealtime from a frustrating struggle into a fun, successful learning experience.

How to Choose the Best Toothbrush for a Toddler Who Hates Brushing

Getting your kids to brush their teeth doesn’t have to be an epic battle you’re destined to lose. Some toddlers love it from the start, while others are way more resistant. Some of them also may don’t let you to brush their teeth, yes, some of our children are pretty independent from the beginning.

Children’s toothbrushes come in a few shapes and sizes. The more advanced features can make brushing fun, but the most important considerations are shape, size and firmness. Do you know what to look for in children’s toothbrushes? Do you believe that your kids current toothbrush is safe for them?

We present you Grabease double sided toothbrush makes brushing baby and toddler teeth faster and safer! It is perfect for children 6 months - 4 years old. Before introduce you to its feature, the story behind it and it really catch my attention. Meet Alma the 8 years old little inventor!!

My little brother never lets my parents brush his teeth, he wants to do it all by himself, but it’s really hard for him to get the brush into all places and he also gags a lot, it’s hard for everyone. So after my mom created Grabease utensils, I thought it could be a good idea to make a Grabease toothbrush. My mom and I worked on the design together and we got it patented in my name!

Grabease double sided toothbrush

Now, we are going to introduce you about Grabease double sided toothbrush. Grabease double sided toothbrush is designed to make brushing easier for parent and child also comes with a stage 1 finger brush.

Read more: Grabease utensils for every child

Editor's Note:

This article originally highlighted a specific brand of toothbrush. To provide more timeless and helpful advice for parents, it has been updated to be a general guide on the innovative features to look for when choosing the perfect toothbrush for your baby or toddler.


Getting your kids to brush their teeth doesn’t have to be an epic battle you’re destined to lose. Some toddlers love the routine from the start, while others are far more resistant. Many independent little ones don't want you to brush their teeth for them; they want to do it themselves!

Children’s toothbrushes come in various shapes and sizes. While fun characters can help, the most important considerations are shape, size, firmness, and—most importantly—safety and effectiveness. Do you know what to look for?

From Problem to Product: The Power of Innovation

Before we dive into the features, it's worth noting that many of the best, most clever baby products were born from a real-life problem. Sometimes, the most brilliant ideas come from parents—or even kids themselves!—who get frustrated with existing products and think, "There has to be a better way." This is especially true for toddler toothbrushes, where innovation is making the daily routine faster, safer, and more effective for everyone.

What to Look for in a Great Toddler Toothbrush

1. The Right Size and Shape

A child's toothbrush should have a small head that fits comfortably in their little mouth and a short, wide handle that is easy for their hands to grip. This empowers them to practice brushing themselves.

2. An Innovative Double-Sided Brush Head

This is a game-changer. Some of the most effective toddler toothbrushes feature a double-sided head with bristles on both the top and bottom. Why is this so brilliant?

  • It's Faster: It brushes the top and bottom teeth at the same time, cutting brushing time in half—a huge win for a wriggly, impatient toddler.

  • It's More Effective: It ensures all surfaces are cleaned, even when your child's brushing technique isn't perfect.

  • It Builds Independence: It allows your child to feel successful at brushing, making them more enthusiastic about the routine.

3. Tapered, Soft Bristles

The bristles must be soft to protect delicate gums and enamel. Look for tapered bristles, which can reach more effectively between teeth and along the gumline for a thorough clean without causing irritation.

4. A Protective Shield

Safety is paramount. A great feature on a starter toothbrush is a choke-protection shield. This is a guard that fits onto the neck of the toothbrush to prevent your child from accidentally inserting it too far into their mouth.

By choosing a toothbrush with these thoughtful, innovative features, you can turn a daily struggle into a quick, safe, and positive experience for your child.

Ready to Win the Brushing Battle?

The right toothbrush can make all the difference in building healthy habits that last a lifetime.

A Parent's Guide to Self-Feeding: Why It's Worth the Mess

As a new parent, your instinct is to be protective. You worry about choking, so you might prefer to feed your child yourself. While every parent has a different perspective, let's discuss the incredible importance of allowing children to be in charge of their own feeding and learn how to listen to their bodies.

This approach, often called Baby-Led Weaning (BLW), can be messy. But this article will show you why you should empower your little one to self-feed—and why it is absolutely worth the mess.

Why is Self-Feeding Worth the Mess?

Learning to eat alone is a critical skill that should be encouraged early. When a child is able to grasp something, letting them explore food with their hands stimulates their development in profound ways.

  • Develops Fine Motor Skills: The act of learning to grab food and put it in their mouths strengthens the small muscles in their hands and fingers. This is the same dexterity they will later use for other positive activities like coloring, drawing, and writing. The more they practice, the stronger those muscles become.

  • Improves Hand-Eye Coordination: Self-feeding requires your baby to see their food, use their hands to pick it up, and guide it successfully to their mouth. This is a complex task that builds crucial coordination.

  • Encourages a Healthy Relationship with Food: Allowing a baby to control their own intake helps them learn to listen to their body's hunger and fullness cues. It gives them a sense of autonomy and can lead to them being more adventurous eaters in the long run.

When is a Good Age to Start Self-Feeding?

Once you introduce solid foods (around 6 months), your child will likely start showing signs of wanting to feed themselves. When your child is able to sit up unassisted and can successfully pick up food and get it into their mouth, it's the right time to begin the transition.

Self-feeding involves lots of feeling, squeezing, and dropping food. It might seem chaotic, but it’s one of the primary ways your child develops essential skills.

How to Start Your Baby's Self-Feeding Journey

Step 1: Start with Hands and Finger Foods

Baby-Led Weaning encourages letting your child explore food with all their senses. Start by offering soft, bite-sized pieces of food that are easy for your baby to pick up and mash between their gums. Think small pieces of soft fruit like banana or avocado, or soft-cooked vegetables like potatoes or pumpkin.

At this stage (around 6 months), finger foods are for exploration, not their main source of nutrition, so you should continue breastfeeding or formula feeding as usual. You'll find that once they become interested in the textures and tastes of food, the journey to self-feeding becomes much easier.

Step 2: Introducing the Right Kind of Utensils

There's no right or wrong time to introduce utensils, but it's the next logical step in their development. The key is to use utensils that are actually made for a baby's hands and abilities.

Traditional children's cutlery often looks like adult cutlery, just scaled down. The problem? A "child-size" spoon is often the same length as a 12-month-old's entire forearm! This forces them to hold it in an awkward fist grip, which doesn't help develop the fine motor skills they need.

What to Look for in a Starter Spoon and Fork:

Instead of focusing on a brand, focus on these revolutionary design features endorsed by Occupational Therapists:

  • A Short, Ergonomic Handle: This is the most important feature. A short, wide handle encourages a child's natural vertical grasp, allowing them to hold the utensil properly and bring it to their mouth much more easily.

  • A Choke-Protection Shield: Many of the best starter utensils have a built-in safety shield below the spoon or fork tines. This prevents your baby from accidentally gagging themselves, giving you invaluable peace of mind.

  • Proportional Sizing: The utensil should be sized for a baby's body, not just a smaller version of an adult's.

A Final Word on the Mess

Messy eating and playing with food are normal, healthy parts of your baby’s development. It's also normal for them to drop or throw food. If you react strongly, they might think it's an exciting new game. The best strategy is to ignore it. Calmly pick up the food without a fuss, or simply leave it on the floor until the meal is over so you only have one big clean-up.

Needless to say, teaching children self-feeding is often a long and messy journey. Just let the food fly!!
— The Real Nutritionist